3D Printing Resources
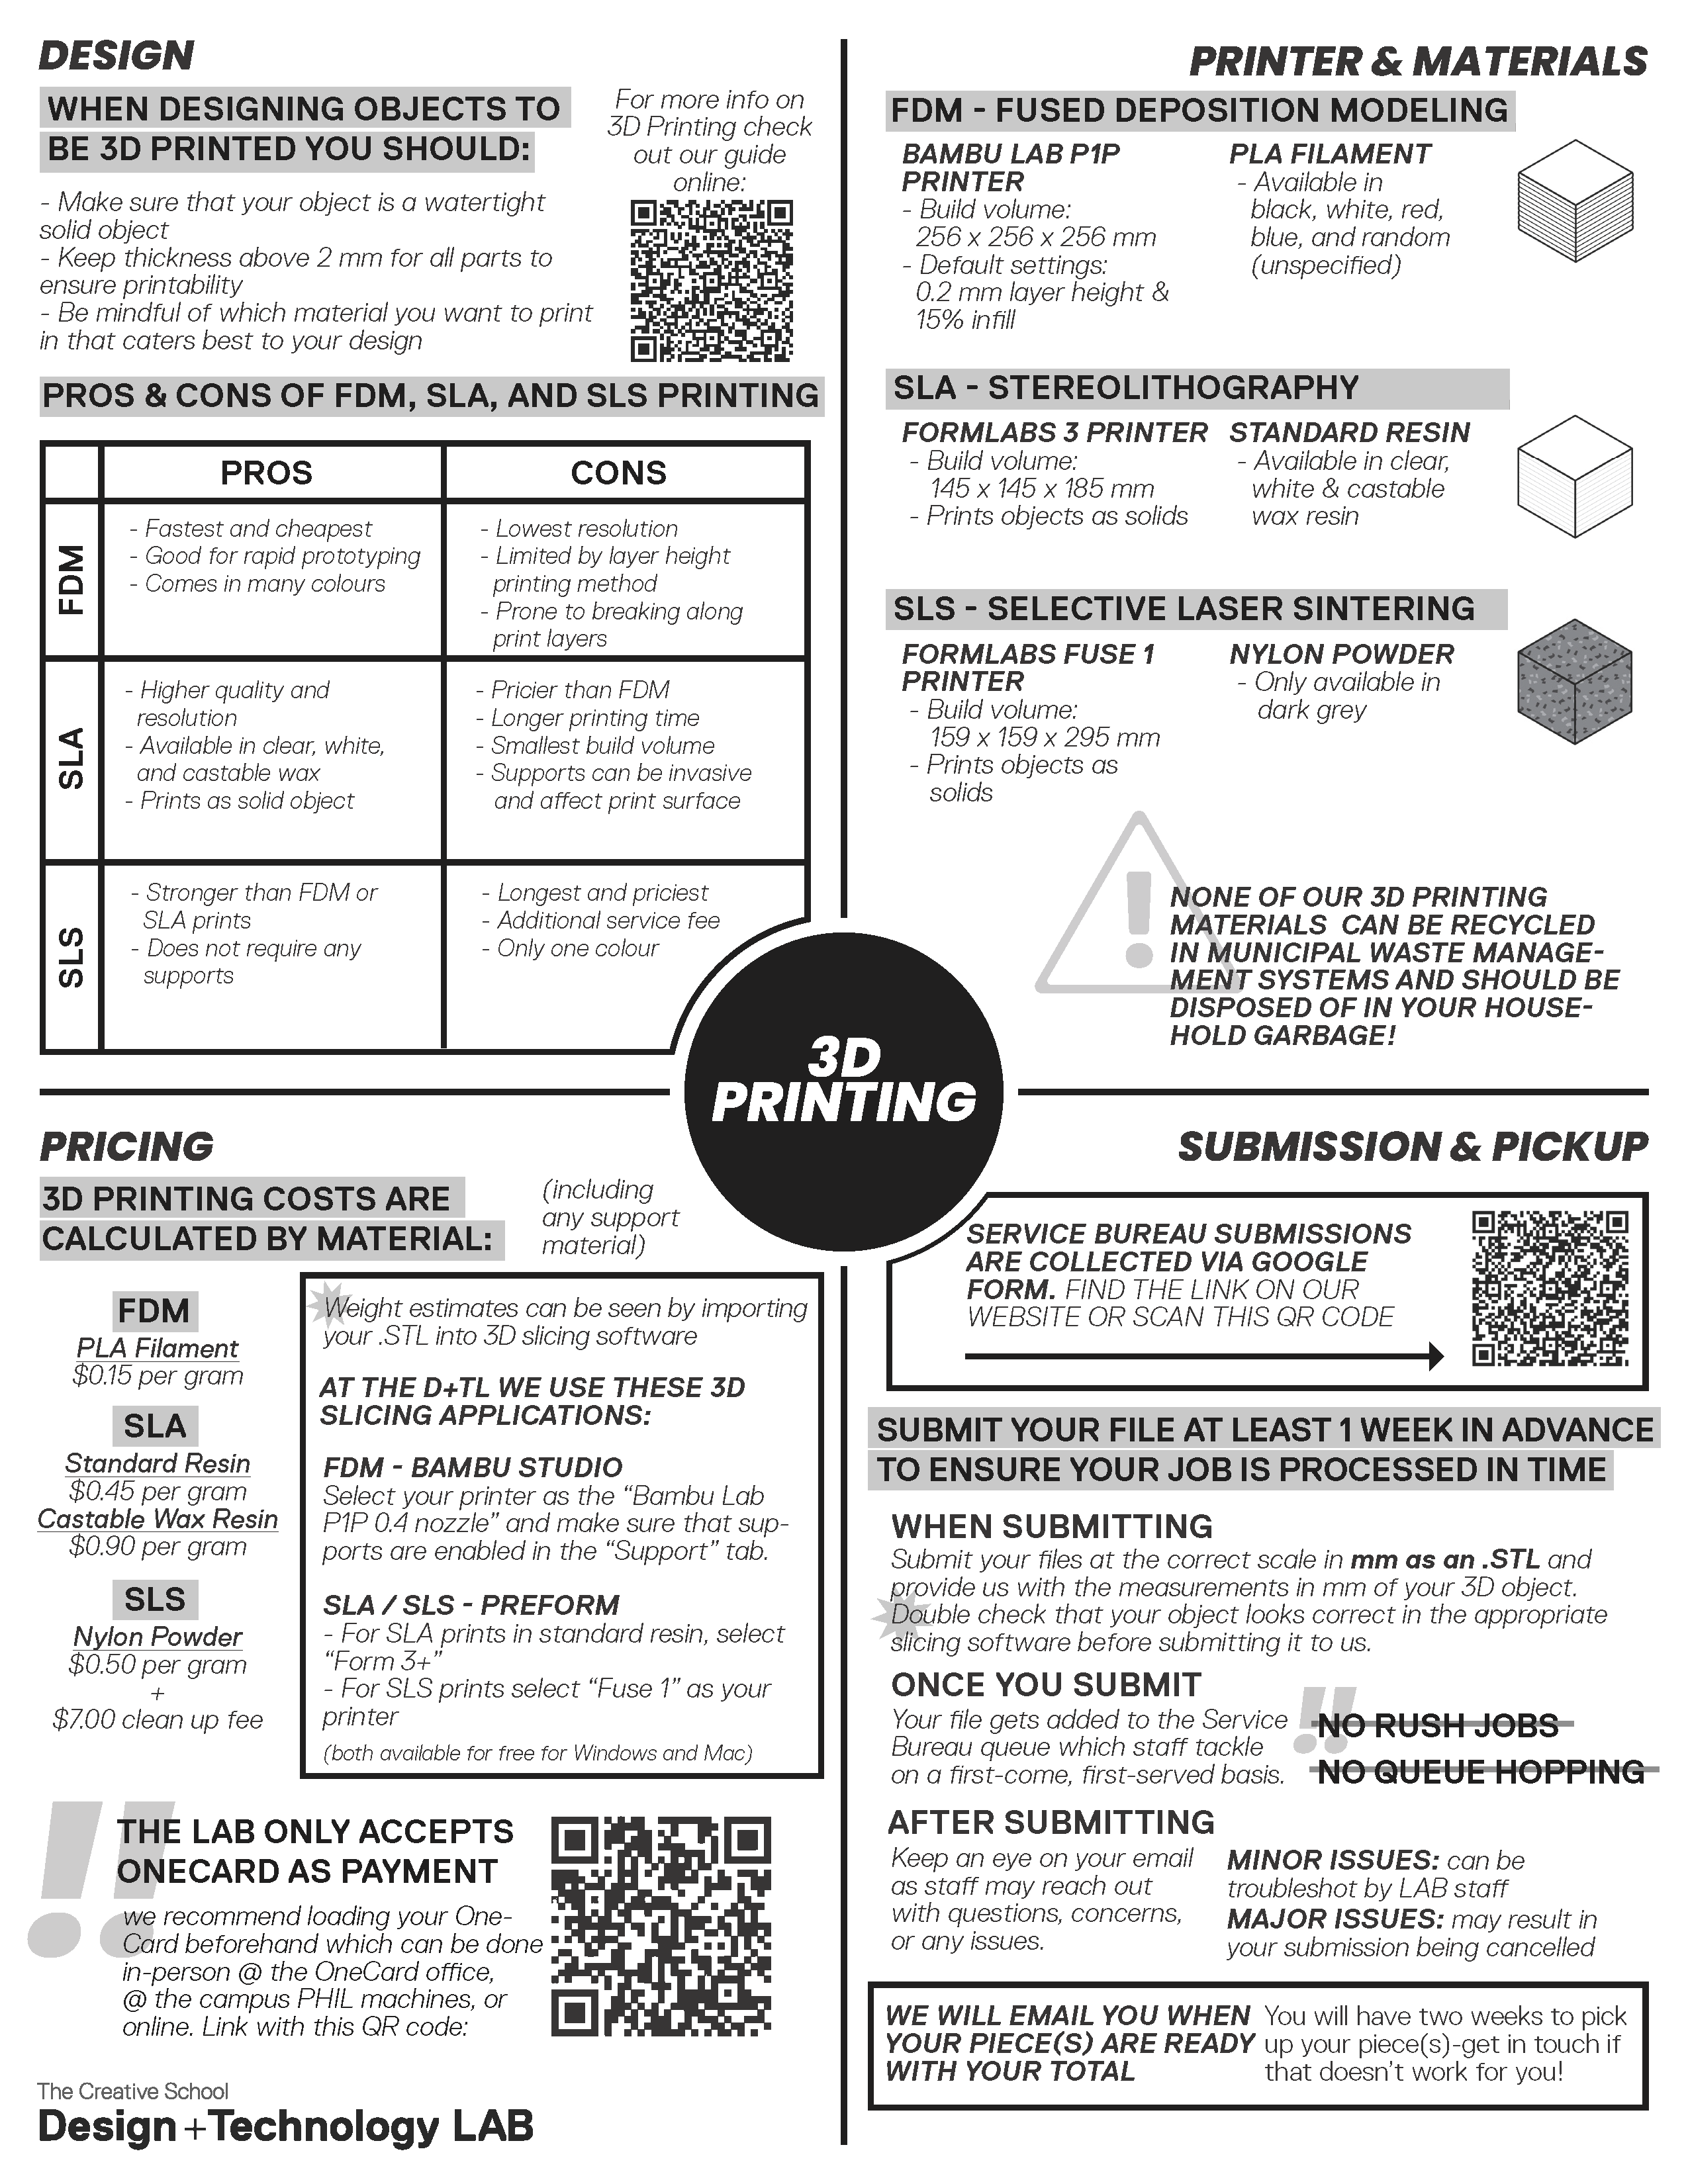
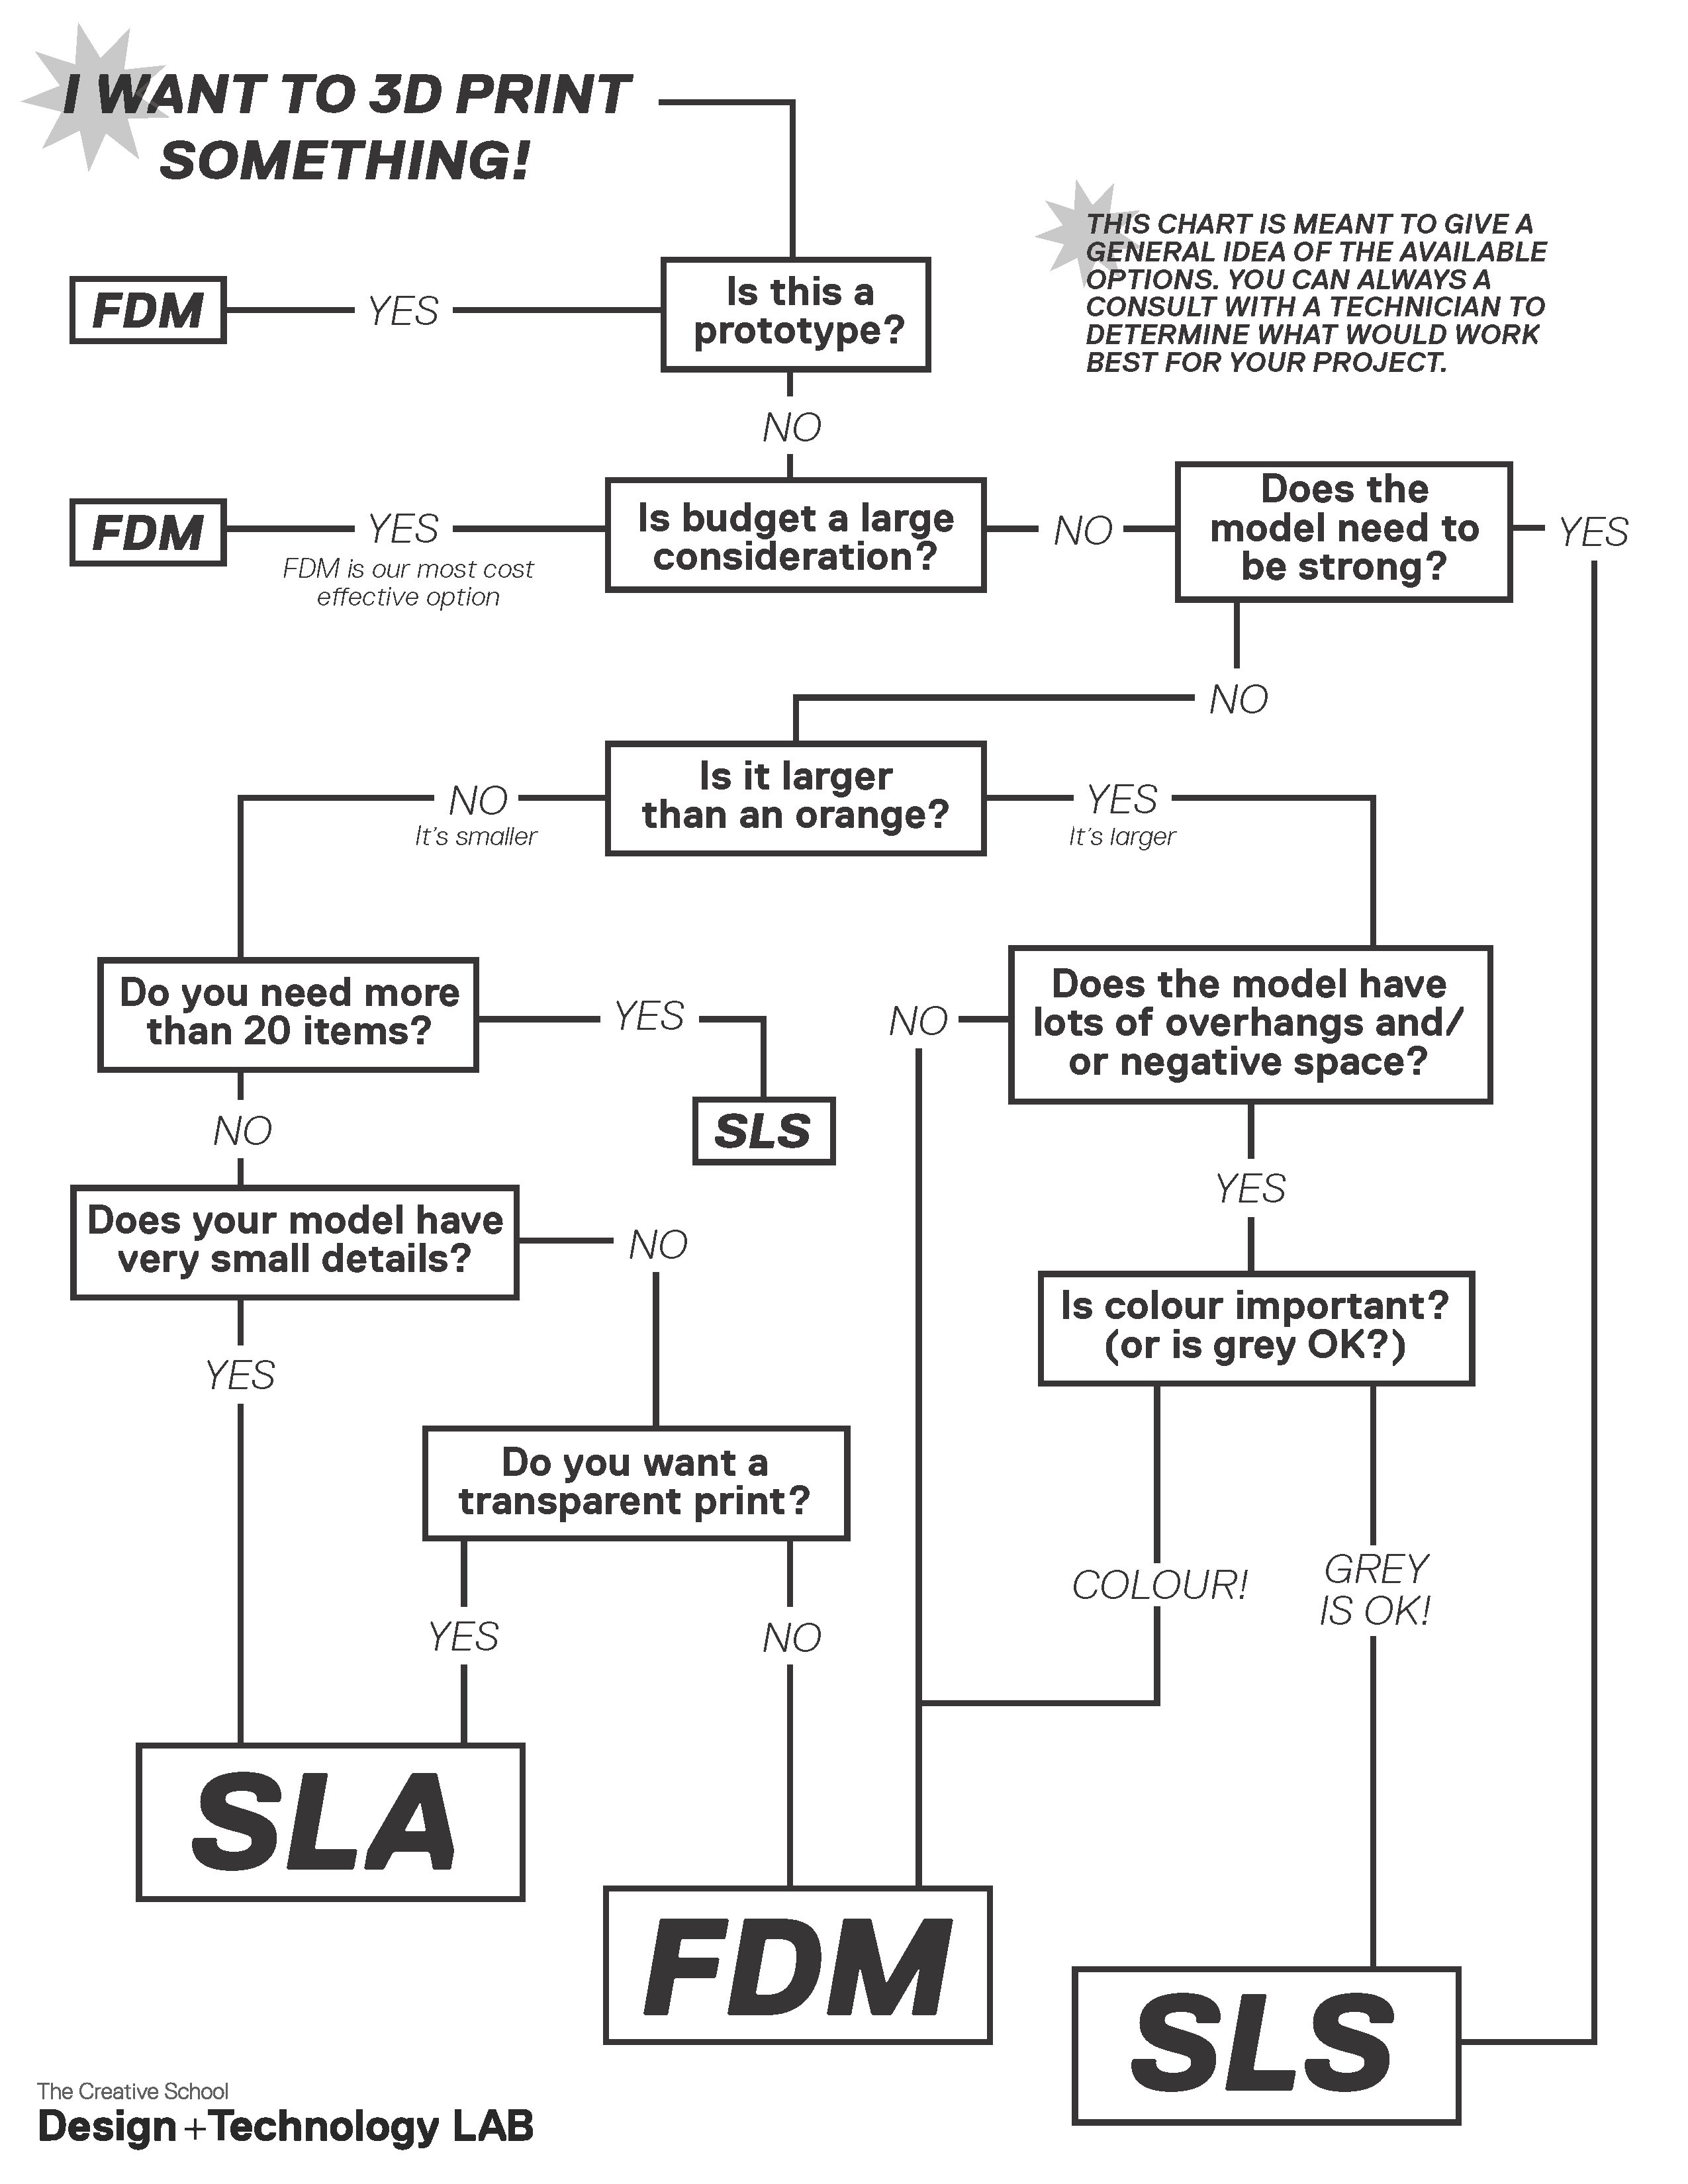
The Design + Technology LAB has a range of 3D printing technologies that each lend themselves to different kinds of projects. Take the time to review the materials below to understand how to prepare your files and determine which printer is right for your work.
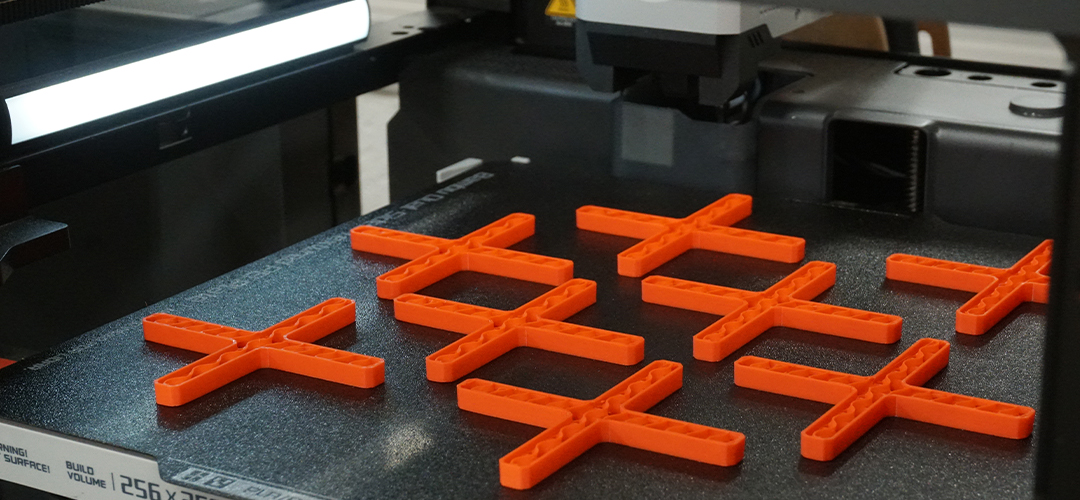
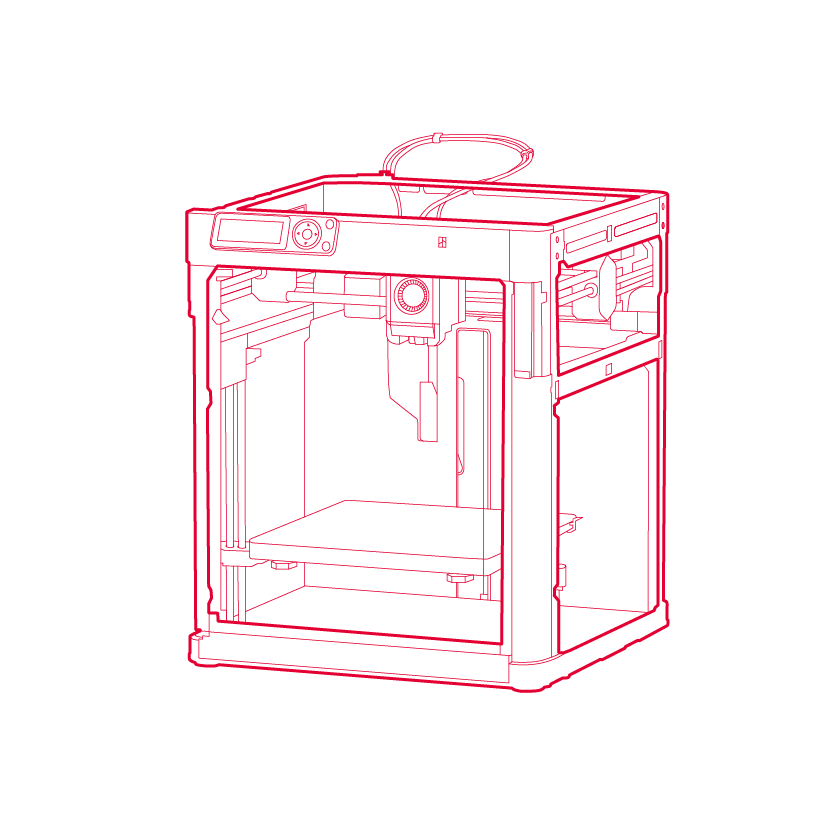
Bambu Lab - P1P
256 x 256 x 256 mm
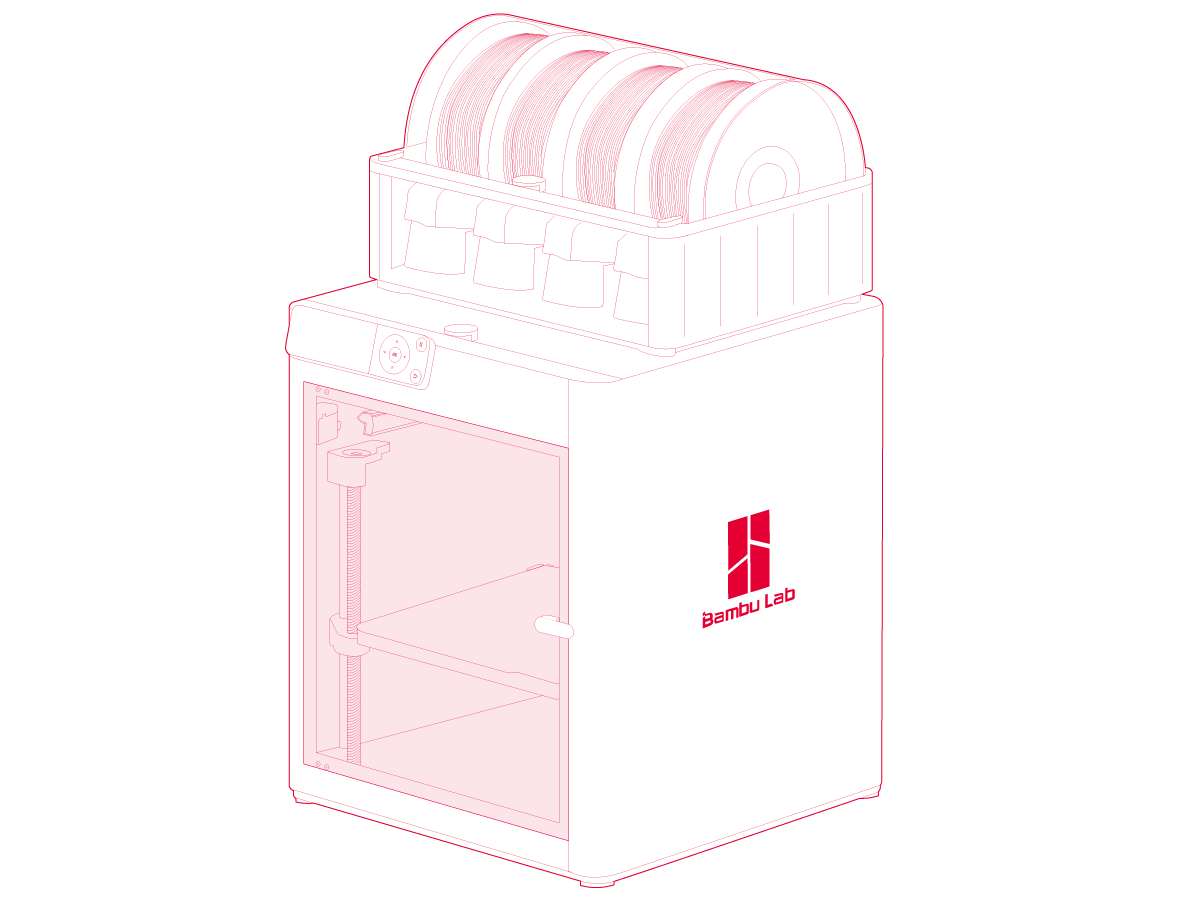
Bambu Lab - P1S
256 x 256 x 256 mm
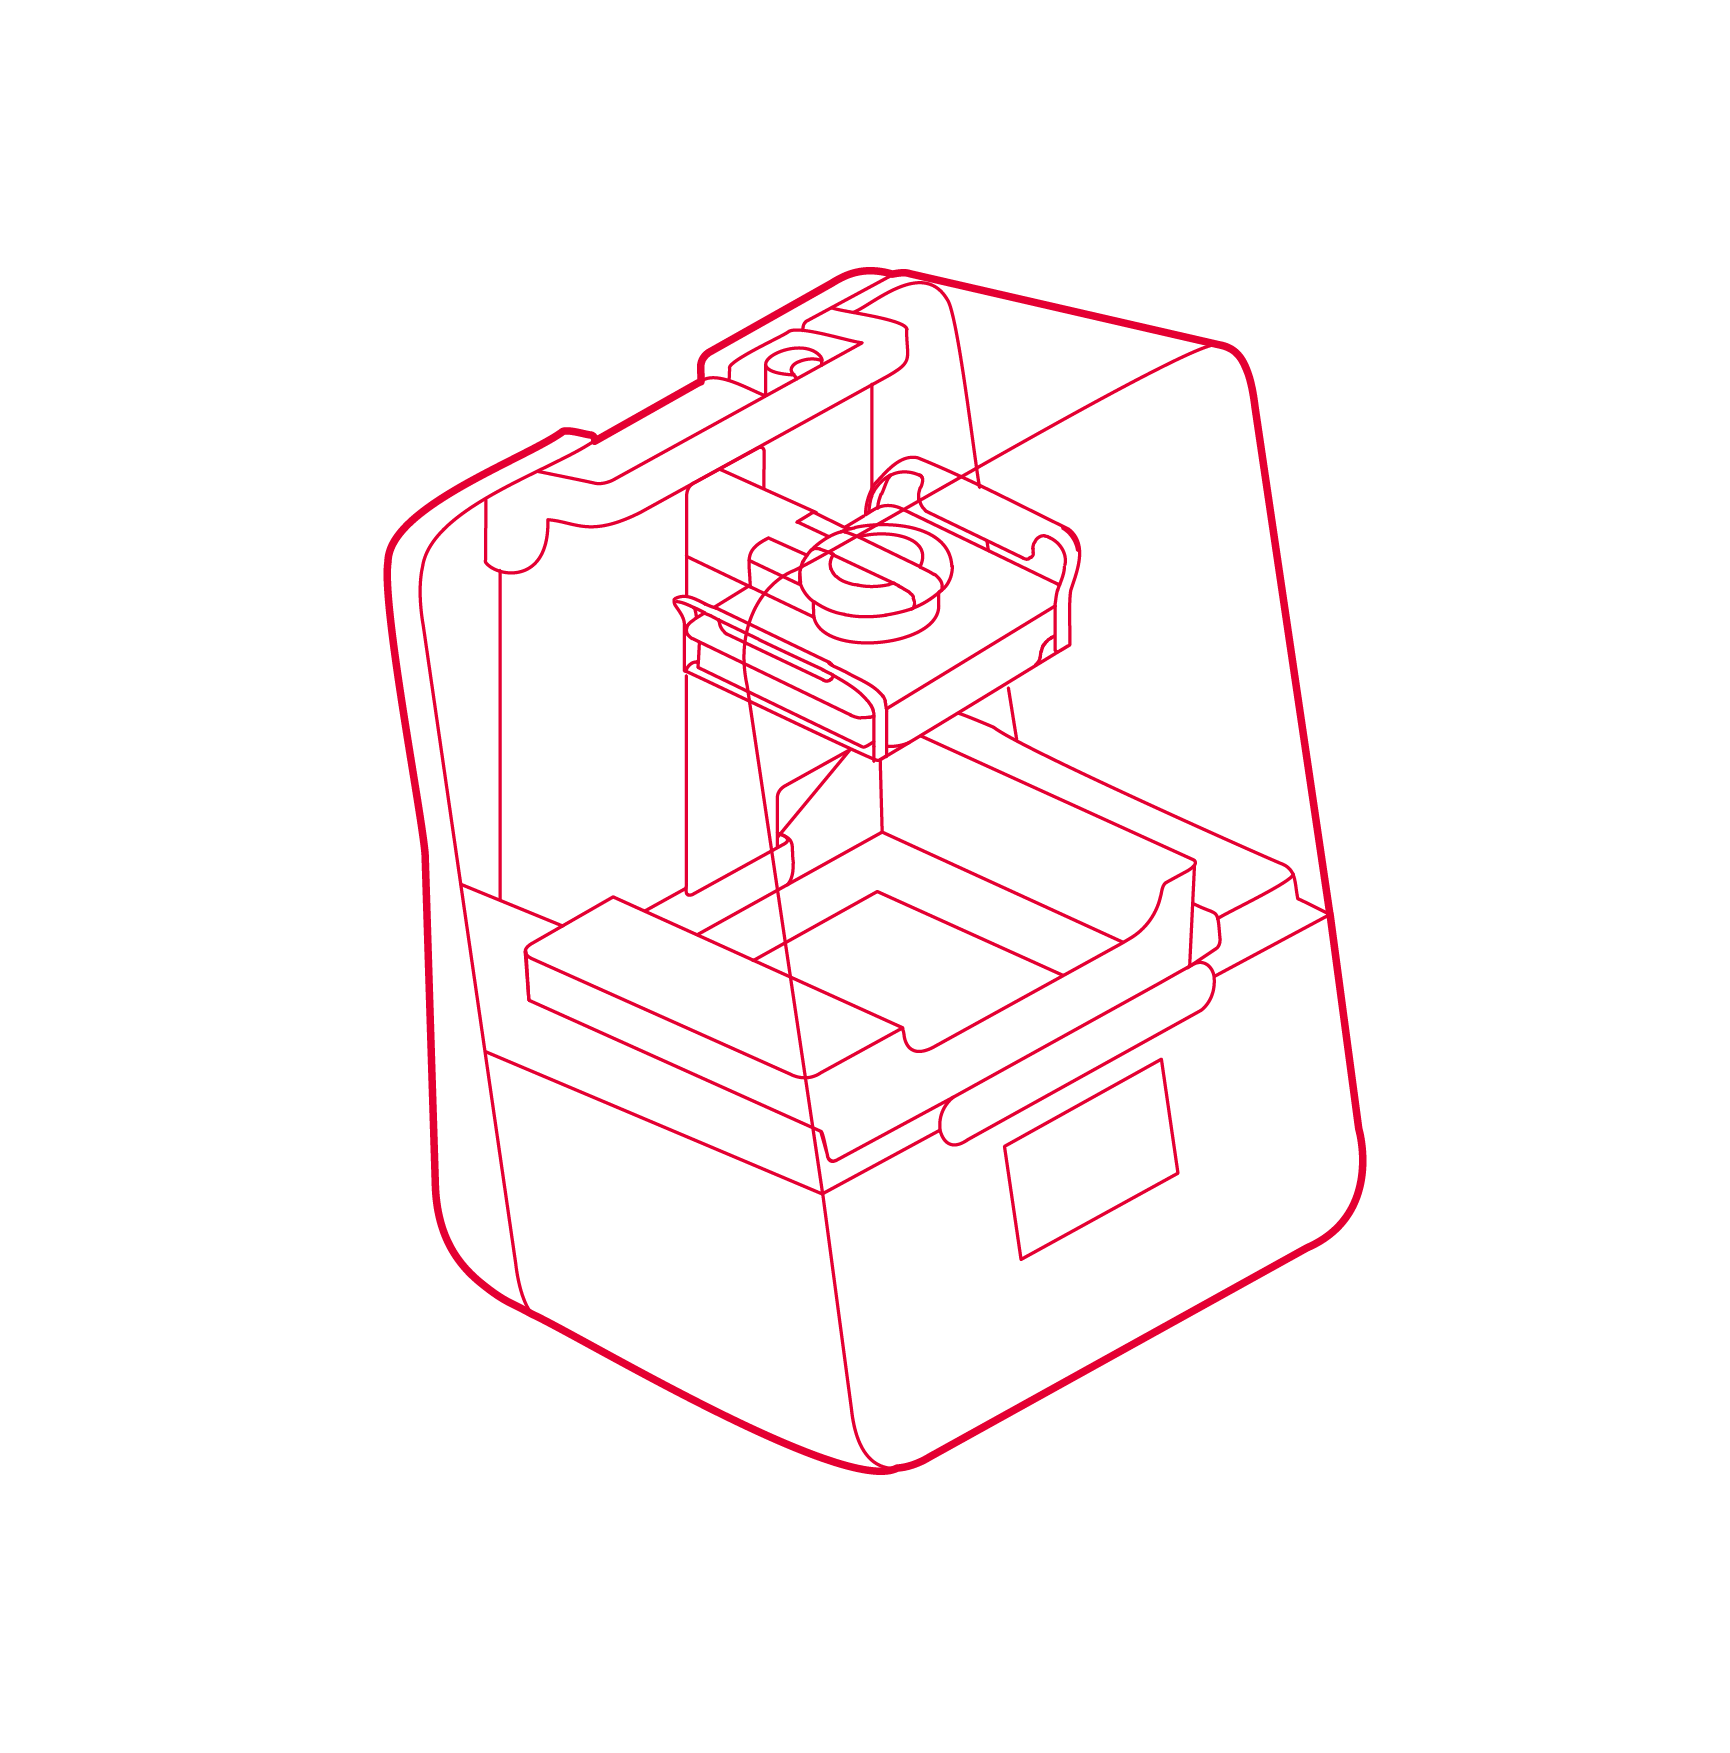
Formlabs - Form 3
145 x 145 x 193 mm
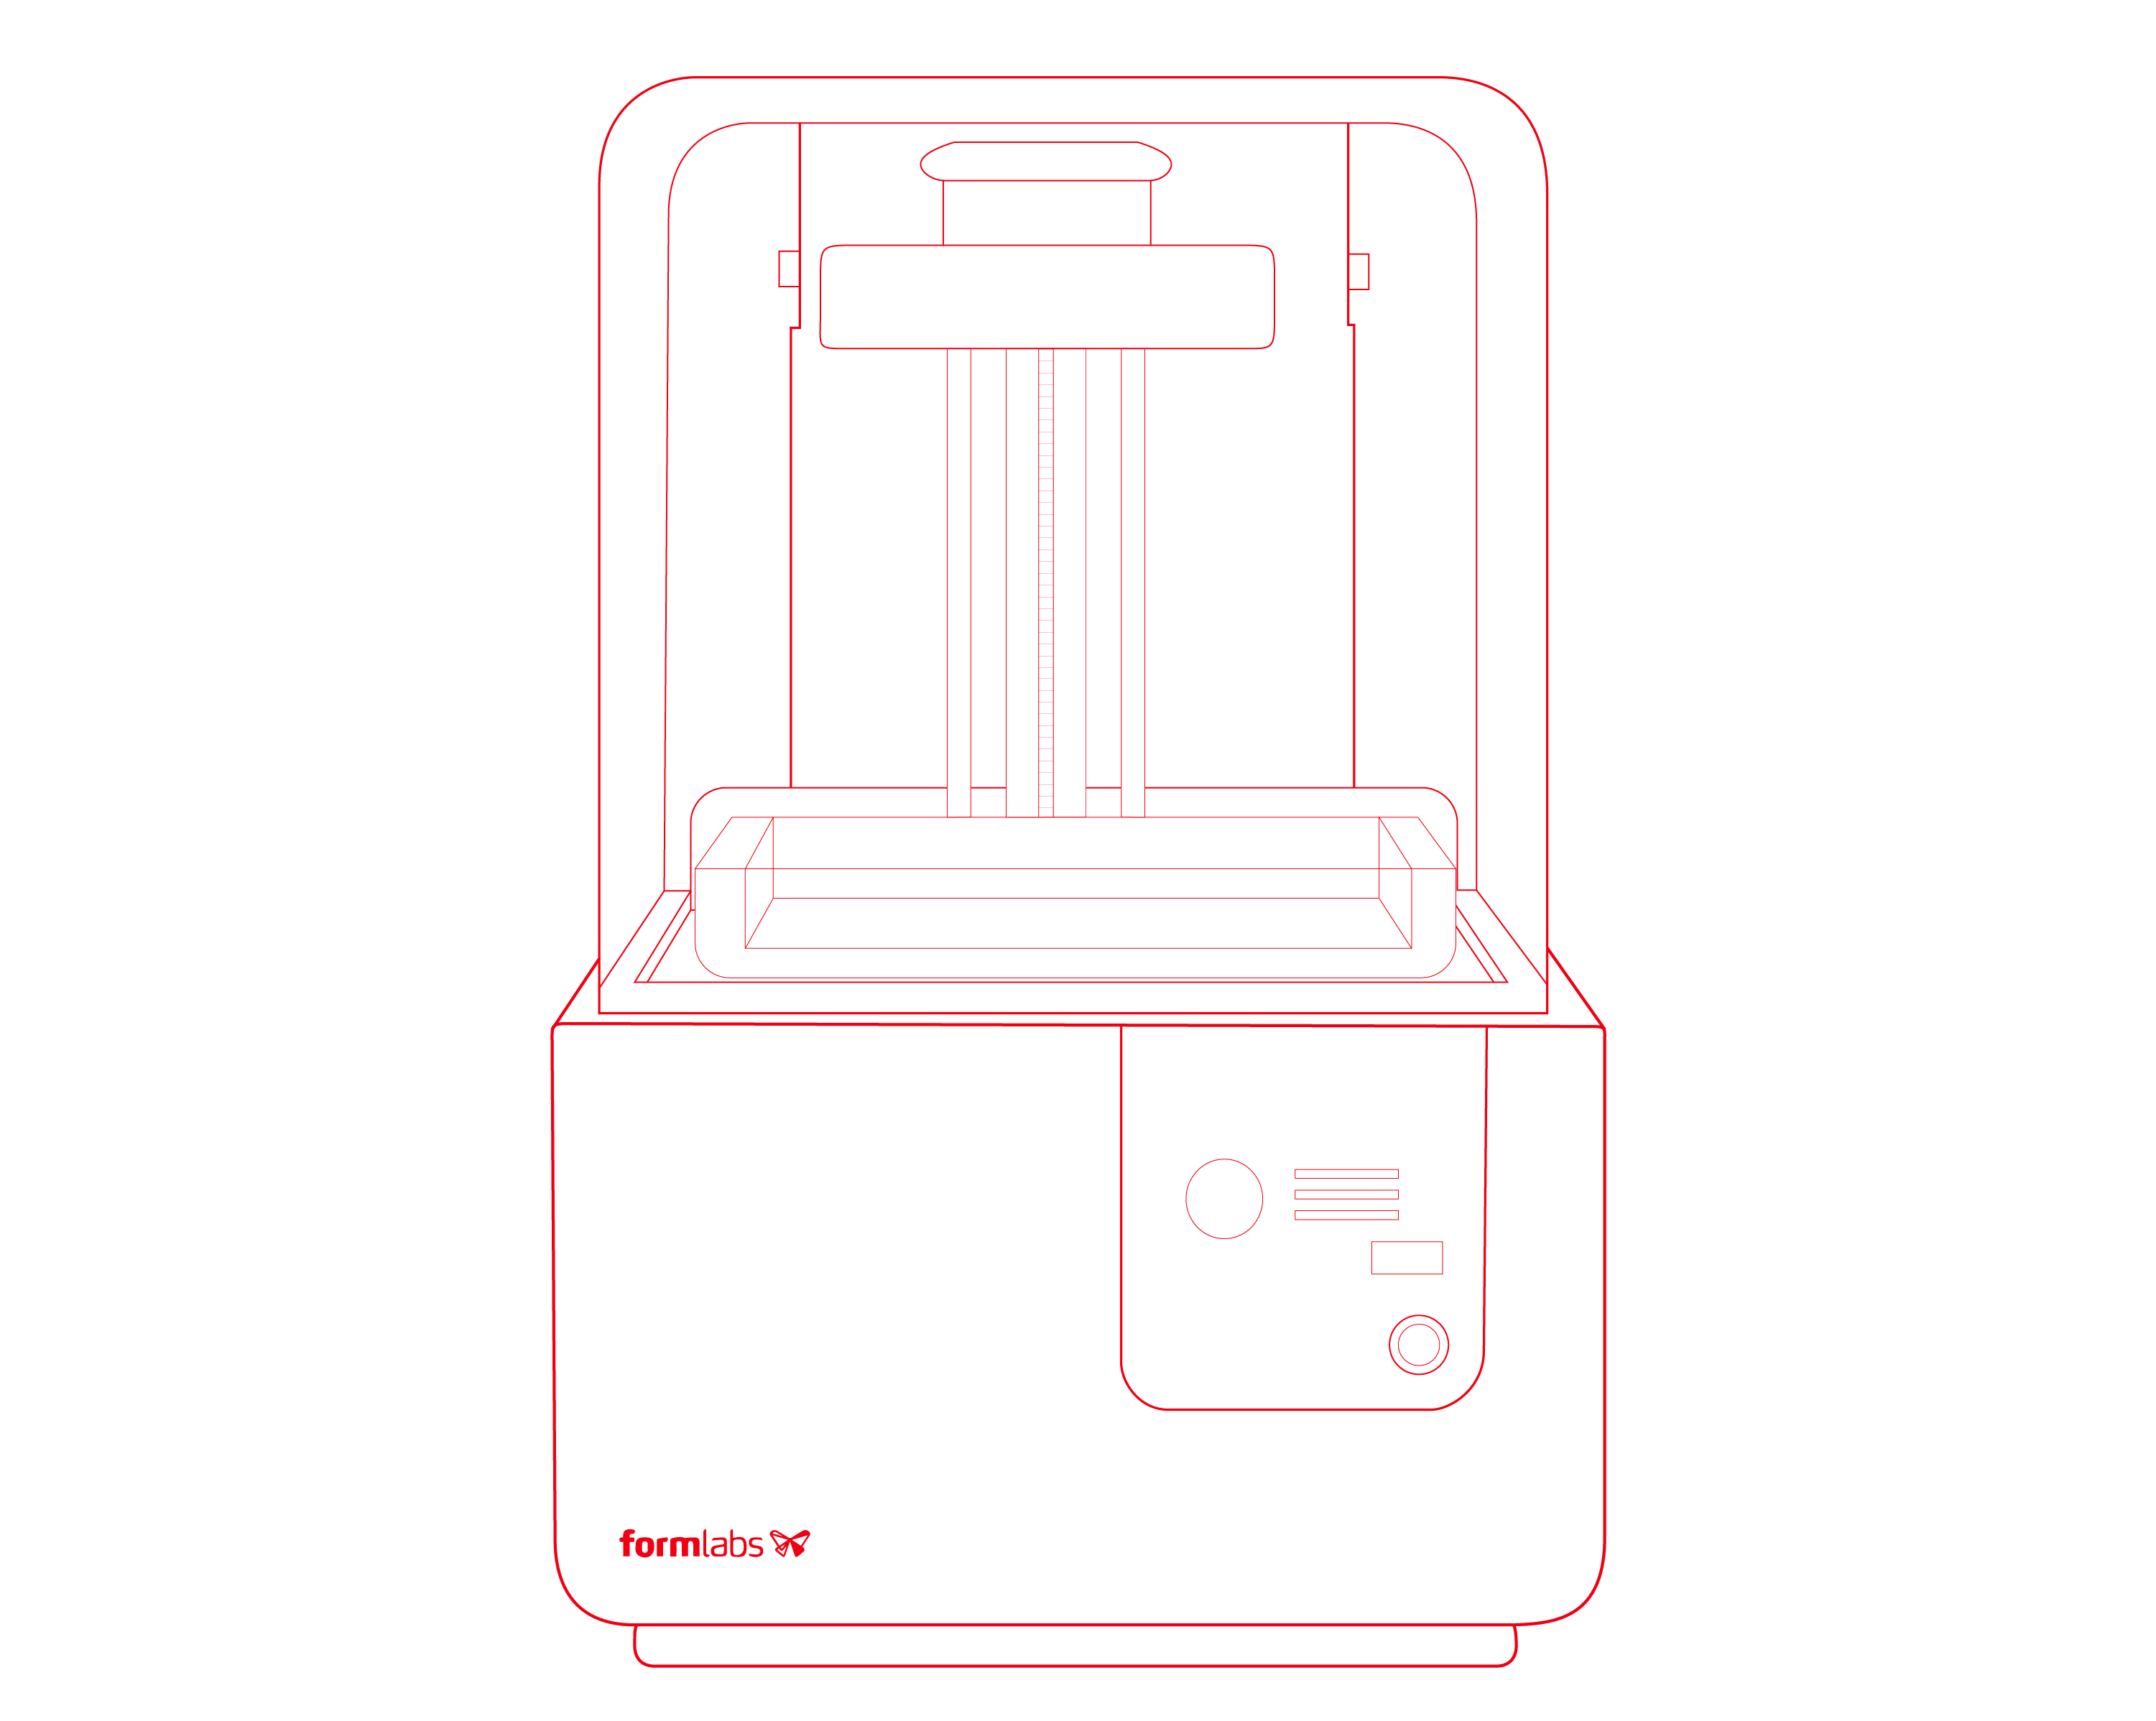
Formlabs - Form 2
145 x 145 x 175 mm
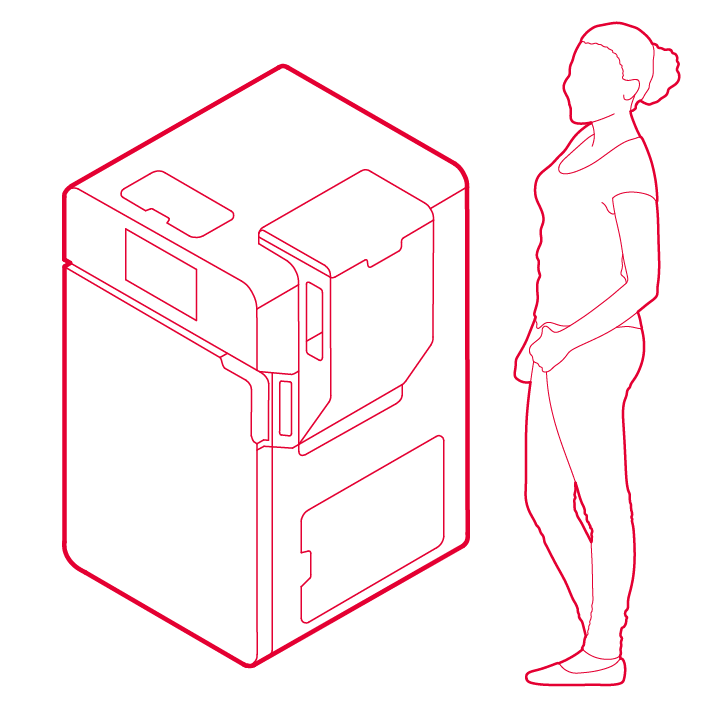
Formlabs - Fuse 1
165 x 165 x 300 mm
Fused Deposition Modeling (FDM) |
|
|---|---|
| Printers | Bambu Lab P1P, Bambu Lab P1S |
| Material | PLA filament |
Stereolithography (SLA) |
|
|---|---|
| Printers | Formlabs Form 3, Formlabs Form 2 |
| Material | White Standard resin, Clear Standard resin, Castable Wax resin |
| Material | Price |
|---|---|
| PLA - White, Black, Grey, Red, Blue (FDM printing) | $ 0.15 per gram |
| Standard Resin - White, Clear (SLA printing) | $ 0.45 per gram |
| Castable Wax Resin - Blue (SLA printing) | $0.90 per gram |
| Nylon Powder - Dark Grey (SLS printing) |
$ 0.50 per gram + $7.00 processing fee |
Online 3D Modelling Workshop with Angelo Mangar - September 2024
Available to TMU account holders only.
Online 3D Printing Workshop with Finch Assadoullaev - October 2024
Available to TMU account holders only.
All models should be scaled and exported in millimeters. Any deviation can lead to scaling issues, resulting in unexpected results.
When you submit your model to the Service Bureau, you provide the dimensions for all three axes: X, Y, Z. This is how we ensure that your model will be printed at the exact required dimensions.
Issues occur when, upon inputting a dimension, the rest of the measurements don’t match the provided specifications. When the original model's porportions don’t match up with the requested scale of the print, we end up with two options, outlined as follows:
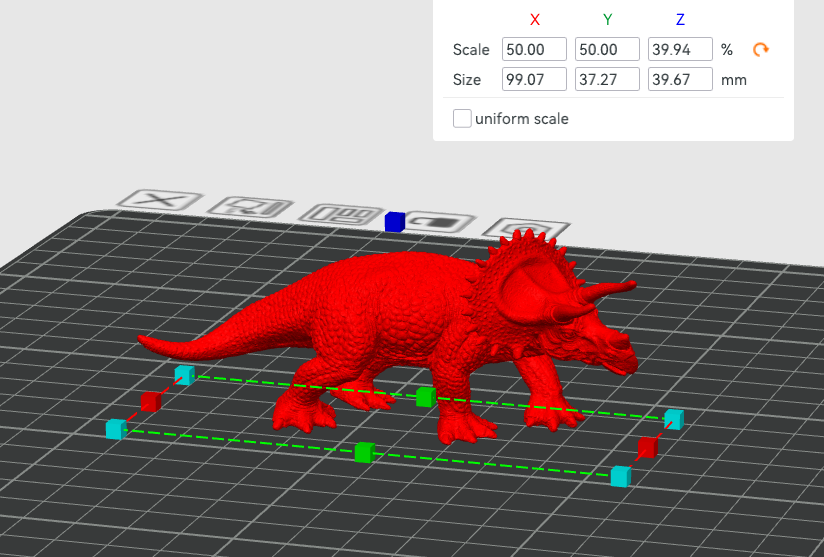
Option 1: Non-uniform scaling
If we adhere to the original dimensions, we end up with a model that is stretched/warped out of its original shape.
For certain models, this could be a non-issue, in favor of being able to fit in a certain slot, for example.
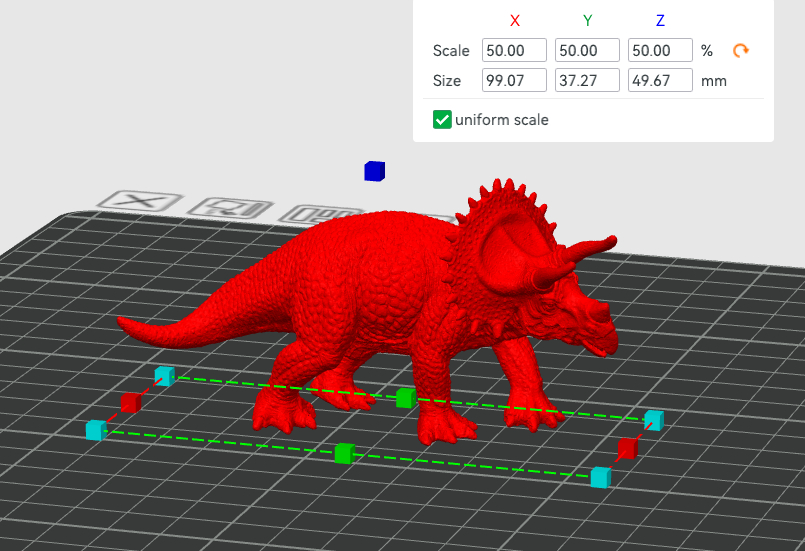
Option 2: Dimensions don’t match
We keep the scaling uniform, and use one of the measurements as the reference point.
In this example, the Z axis measurement is 10mm larger than the requested dimension, but the X & Y axes match up.
Solutions:
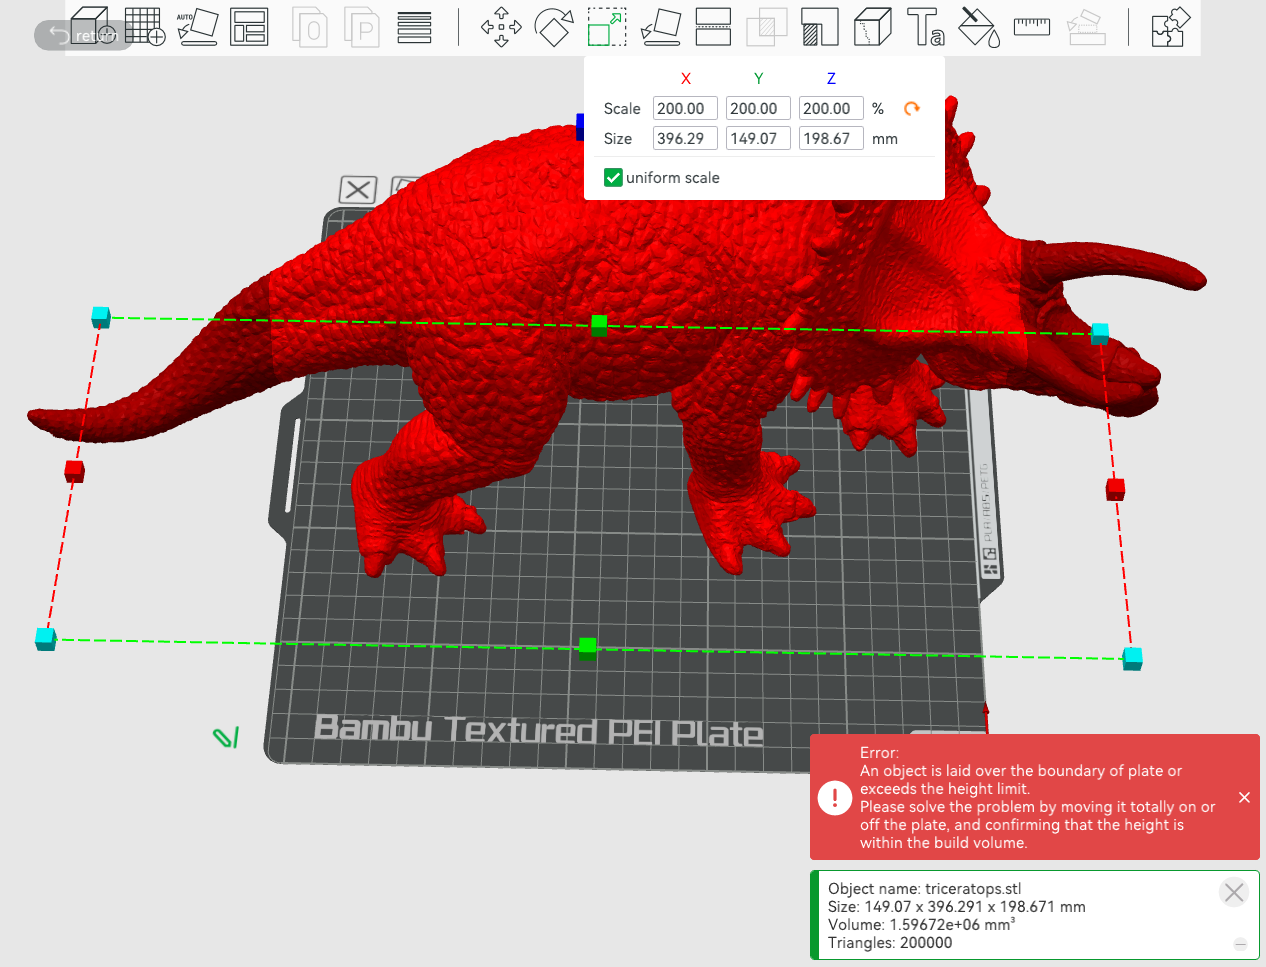
- Double check scale before exporting & submitting your model. The best method for this would be to open up your model in Bambu Studio.
- Request non-uniform scaling in the submission notes (knowing that this may warp/distend your model)
- Unless specifically requested, the Lab will reach out to you for clarification regarding non-uniform scaling
- Specify which axis to use as a reference point when scaling (X, Y, or Z)
The size of your model exceeds the limits of our printing bed.
Each of our printers have a different bed size which determines the maximum size of model that can be printed. As well, prints that extend to the very edges of the print bed have a higher chance of failure due to a variety of factors, including bed adhesion and placement of the 3D printer head/nozzle. We recommend leaving a margin of 5-10mm min. on all sides to ensure optimal results.
If your print is too large consider the importance of the scale in relation to your project when determining the best troubleshooting method.
Solutions:
- Explore a hybrid fabrication approach and design parts of your project using other techniques, such as laser cutting, wood working, crafting, papier mâché, or otherwise
- Scale down your model(s)
- Bring it into your 3D modeling software (or even Bambu Studio) and cut the model into separate printable pieces
- These pieces will then need to be reassembled post-print
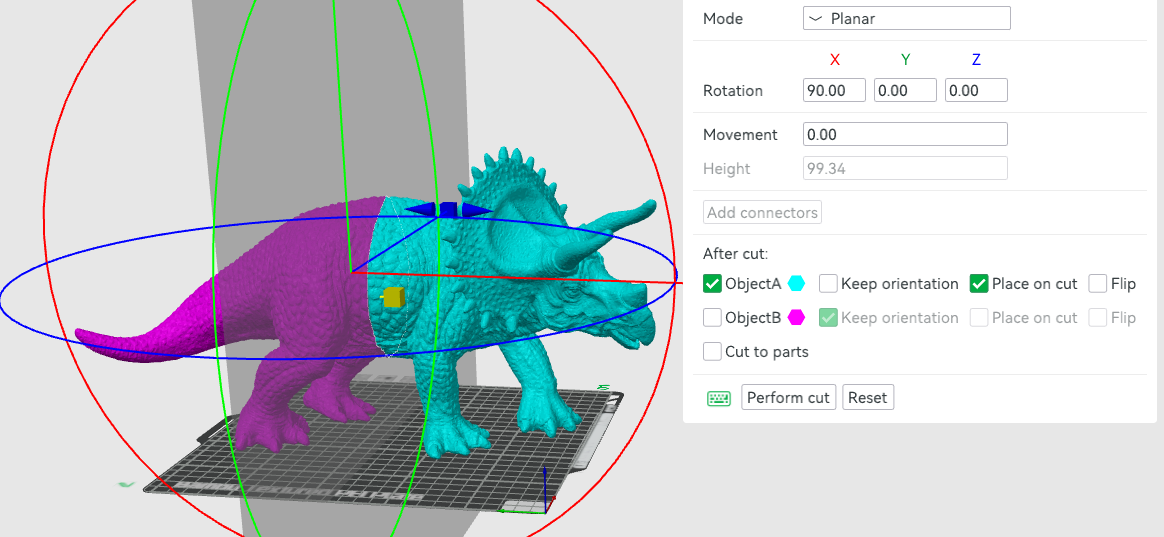
Step 1: With your model selected, click on the “Cut” tool (keyboard shortcut: C).

Your model will look something like this:
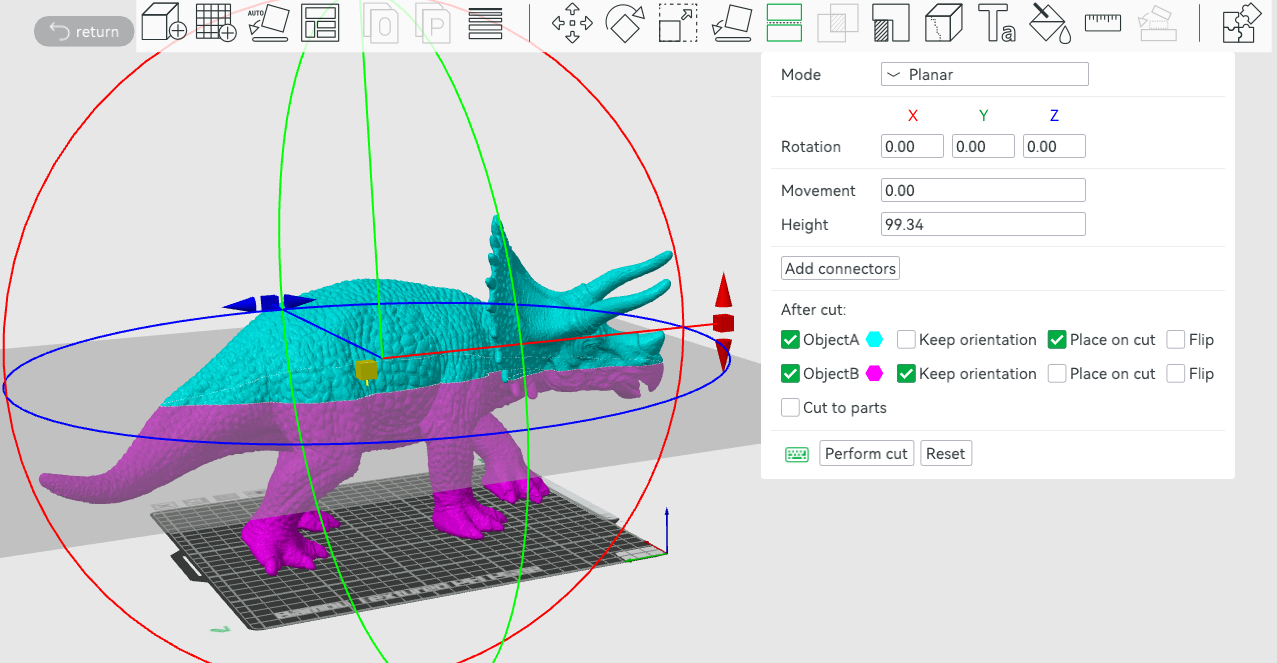
Step 2: Different “Cut” settings will work better for different models.
We recommend using “Planar” mode but feel free to experiment with different settings! Each mode has their own settings which can be fine tuned to better suit your needs.
- “Planar” mode creates a simple straight cut across your model.
- “Dovetail” mode creates two pieces that slot/slide into one another.
In this example, the best technique would be to use “Planar” mode and rotate the plane 90° on the X axis, as this model is too long for the printing area, but would fit vertically in two pieces.
“Keep Orientation” will maintain the original orientation of your model while “Place on cut” will orient each model along their newly cut flat edges.
For FDM prints, in most cases, “Place on cut” is the best choice for each piece - depending on your model’s geometry & design - as the flat surface will be helpful for bed adhesion and help to achieve a more successful print.
Deselecting ObjectA or ObjectB will delete them from your project. This can be helpful to isolate certain parts and print smaller test pieces to double check the scale, the fit, the overall aesthetic, or other aspects.
Once you’re satisfied with the cut line placement, hit “Perform cut.” Otherwise, you can always hit “Reset” to return to the original, default settings (or undo the cut afterwards if you want to look for a different result).
Repeat these steps as necessary until all of your pieces fit within their build plate.
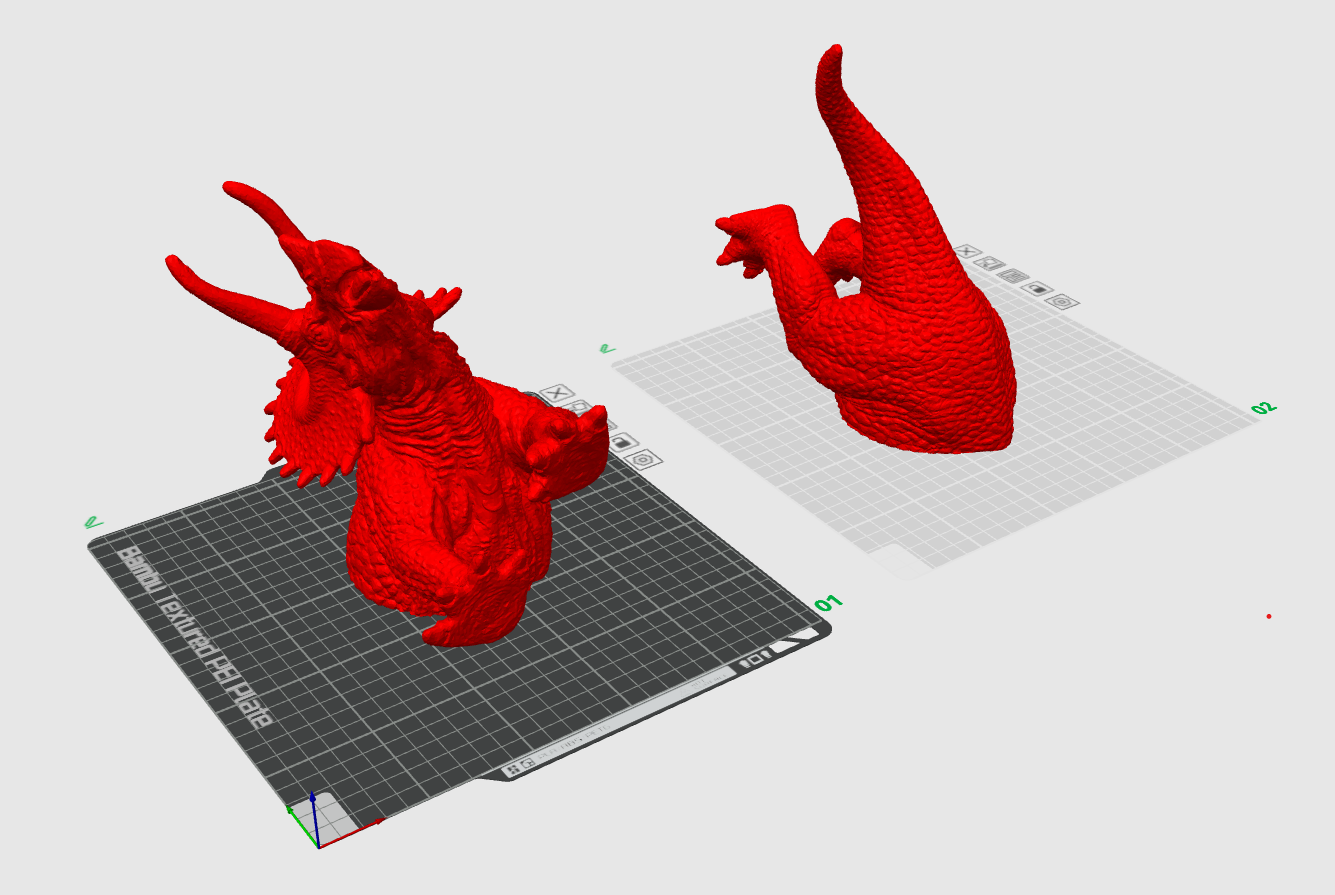
Step 3: Then, move your cut parts so that they are within the build plate.
Use the “Arrange all objects” [A] tool (4th from the left) to automatically space your models or add a specified amount of spacing. Bambu Studio will automatically add a new build plate when using the “Arrange all objects” tool, if required.
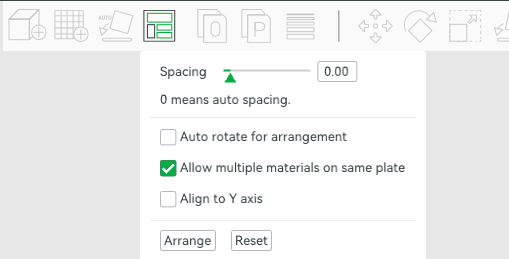
Alternatively, you can manually move your models by selecting the part and either dragging & dropping or using the “Move” [M] tool. As necessary, use the “Add Plate” tool from the top bar (second from the left) and place your new cuts manually.

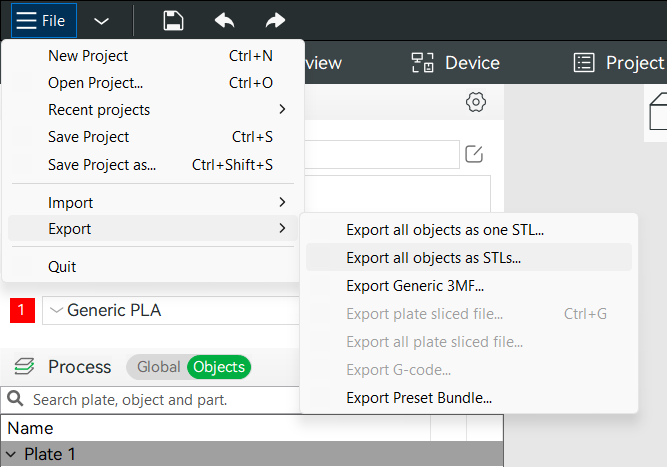
Step 4: Export each object as its own .stl file.
Navigate to “File” in the top left corner, go to “Export”, and then “Export all objects as STLs…” not “as one STL.”
Each exported .stl will be named fileName_A and fileName_B etc.
The models can then be reassembled after. Various post-processing techniques exist online for gluing your parts together and hiding the seams, with the most popular adhesive being super glue. We encourage you to research & experiment with various options until you find the best technique & aesthetic for your project.
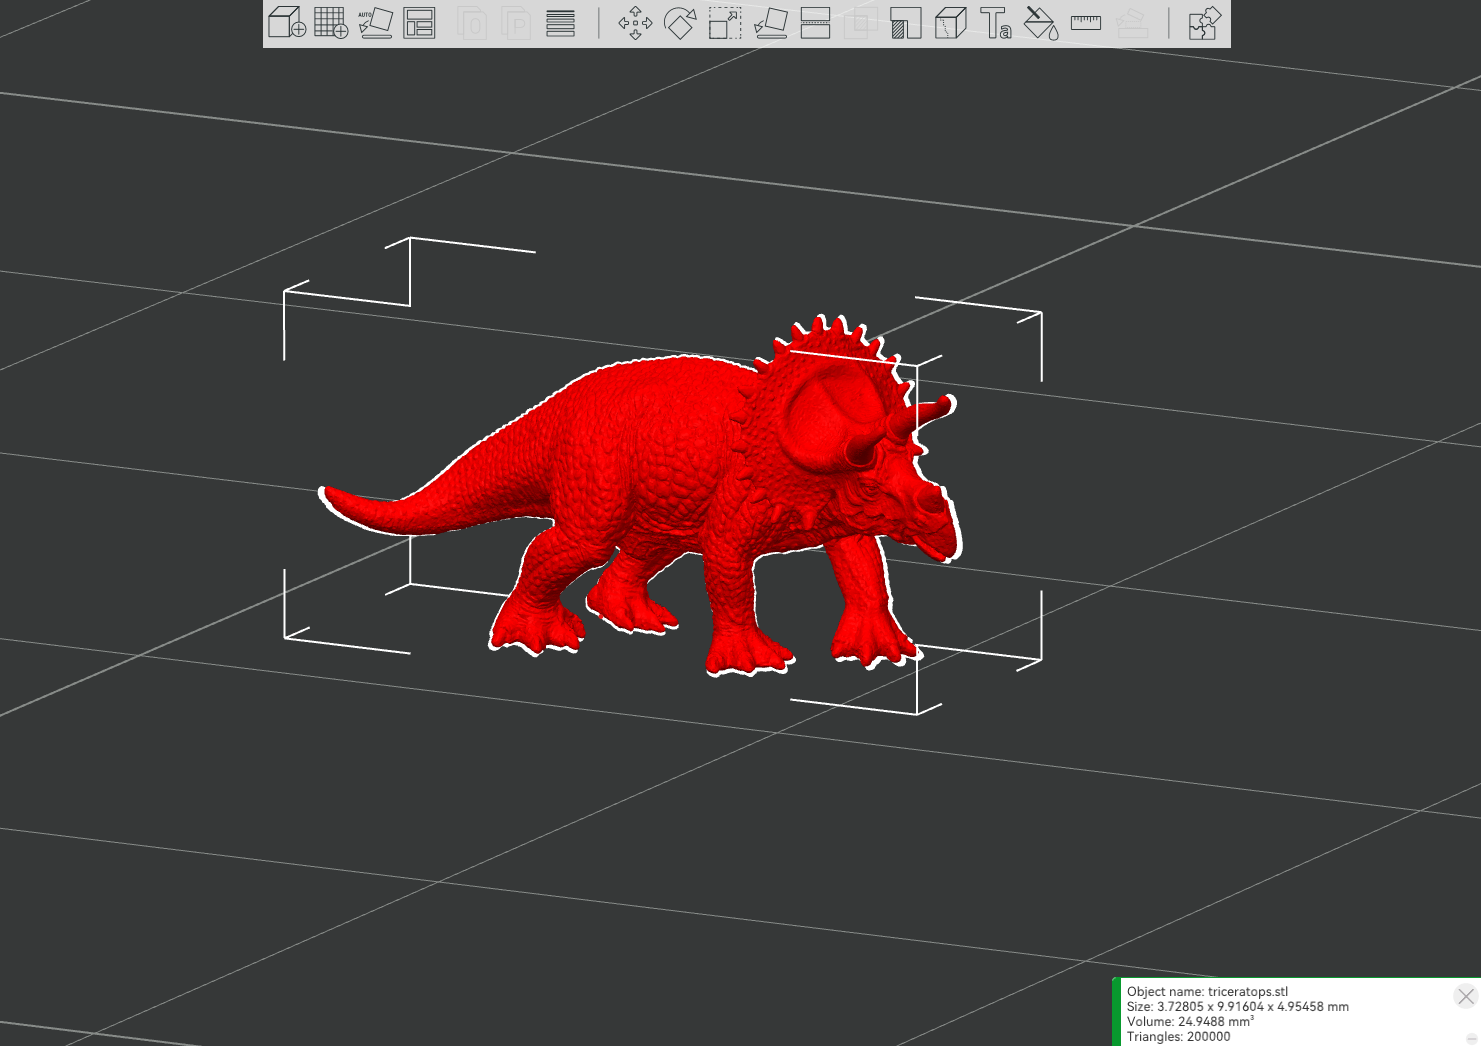
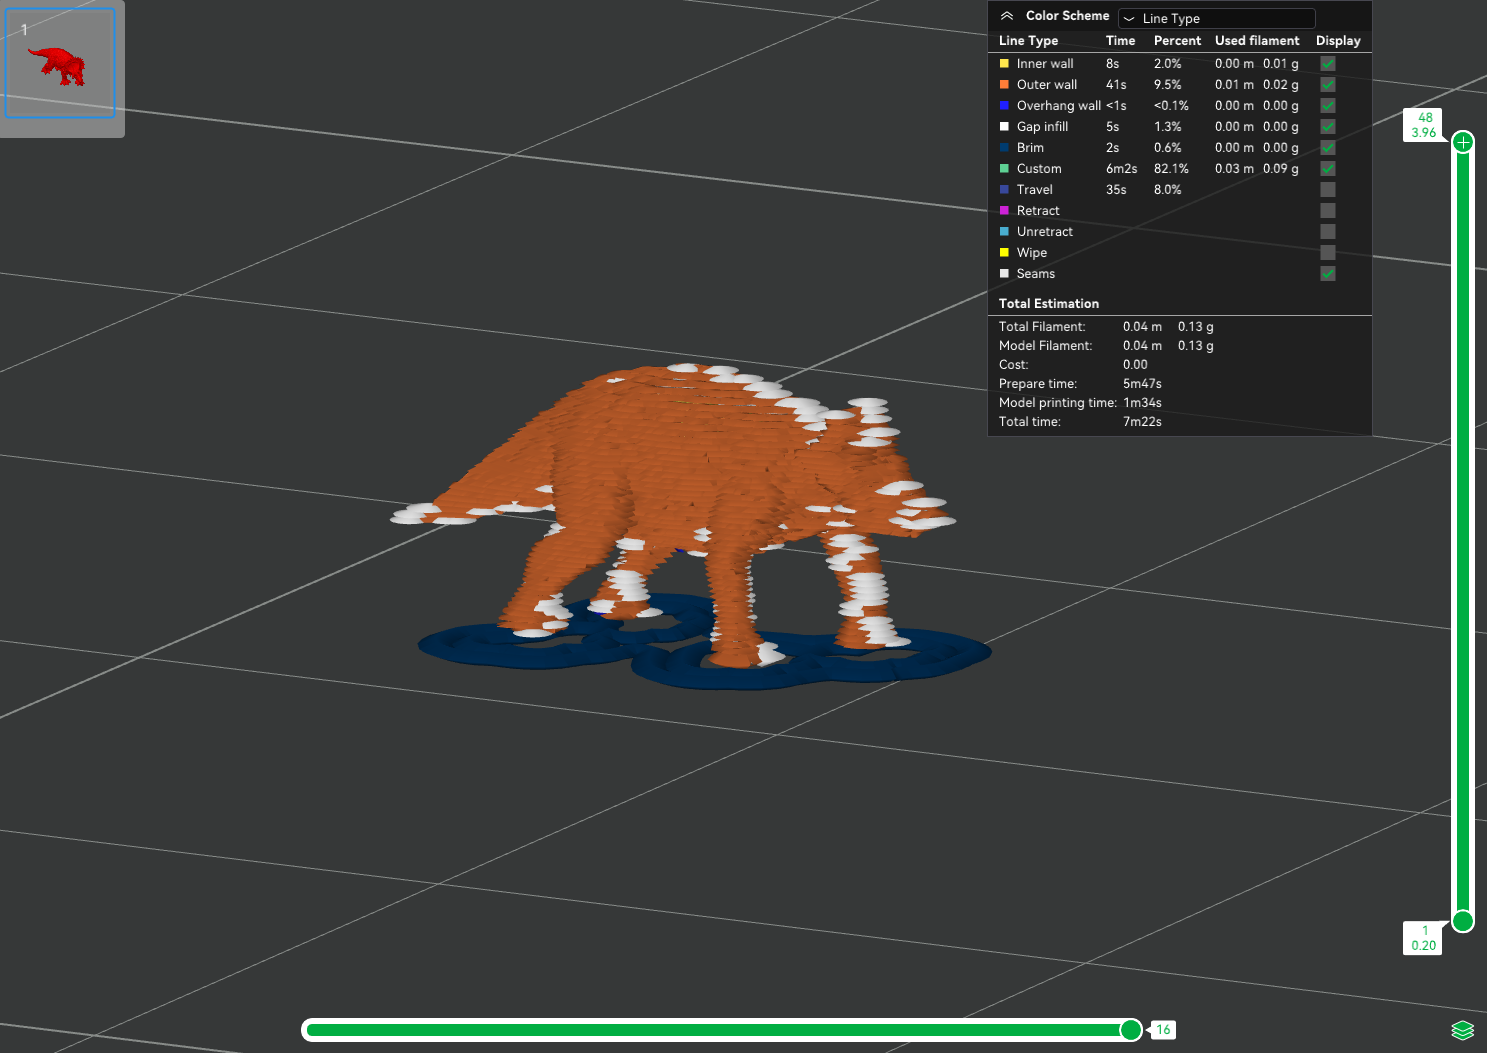
When a model is said to be too small, it often goes beyond the capabilities of the 3D printer, sometimes even at the highest print resolution. If a print is too small to print at all, the only option is to adjust the scale.
A small STL file, previewed as a 3D model:
A digital preview of the final 3D print:
Solutions:
- Best Option: scale up the model
- Consider the level of detail and/or desired scale & determine which one is more important for your project
- Print as-is, knowing that there will be loss of detail
The walls are too thin and thus, don’t print. 3D printers have a minimum wall thickness that they can print due to the physical limitations of the printing process.
Solution:
- scale-up your model
- thicken-up all thin walls and details to at least 1.5mm (1/16").
Geometry or edges are called “non-manifold” when an edge is shared by more than two faces, resulting in two (or more) identical edges which overlap on one another. Any files with non-manifold edges will throw an error and fail to print.
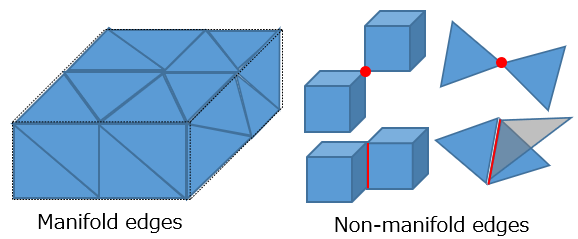
Solutions:
- Repair* your model through Bambu Studio
In Bambu Studio, you will be alerted when your model contains non-manifold edges. Bambu Studio has a built-in repair tool which will automatically identify and remove any non-manifold edges.
This is the default solution used at the D+TL when we receive models presenting with non-manifold edges.
*Only available on Windows devices.
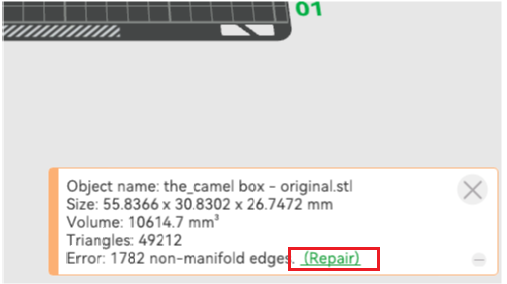
- Repair your model through online tools such as Nano3D Tech (external link) or other software
This typically involves uploading your print to an online service that functions in a similar fashion to Bambu’s built-in repair tool. The Lab also encourages you to explore software options which will grant you greater flexibility & control over your models!
NOTE: automated repair tools & online utilities may remove certain details and/or features through the repair process. Always double check your model after running it through any of these tools.
The Lab currently only accepts .stl files for all of our 3D printing services. This is due to our various printers & slicing softwares each having different file types that they are able to support or not; however, all of them can accept .stl files.
Solution: Re-export the model as an .stl.
If you don’t have access to the original modeling file or software, there are many online converting software options. In this scenario, it would be wise to then import your converted file into Bambu Studio or other slicing software to ensure the geometry, detail & scale haven’t been compromised.
TIP: Bambu Studio also supports many different file types (.3mf, .stl, .oltp, .stp, .step, .svg, .amf, .obj) which you can import and then export as an .stl file.
A 3D printed piece will almost always look different than its digital counterpart - sometimes too different. While there are some possible troubleshooting pathways, it’s important to take machine capability into consideration when planning projects to ensure that you achieve your desired results.
Solutions:
- In the “Special Requests” section of the file submission form, request a higher print resolution.
- For FDM prints, our default is the 0.20mm Standard Preset.
You can request 0.16mm, 0.12mm, and 0.08mm as finer settings, with 0.08mm being the finest. These mainly affect the layer heights, where the smaller value indicates a smaller layer height, and thus a higher print quality.
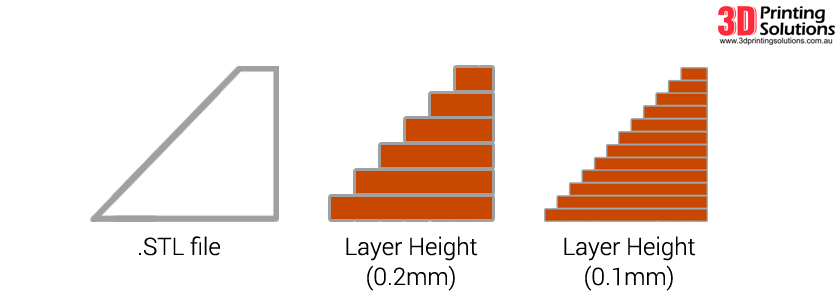
- Exaggerate details in your original model. Often, important details must be exaggerated when 3D printing in order to be properly captured.
- Consider the orientation of your model - details are captured better in the vertical orientation than in the horizontal (e.g. it’s better to print a person standing up than laying down).
- Consider using a different printing method. In terms of detail, from least to most detail-capturing, your options are FDM < SLS < SLA. (detailled elements and textures may be more successful in SLA!)
TIP: prototype in a more affordable material first to ensure your model looks approximately how you intended before going for the more expensive option! This way, you’ll have more freedom to fine tune and experiment before printing the final piece.
There are a few reasons why a print can break, each with their own solutions. When in doubt, reach out to the lab or come by during our Open Lab hours for any support.
Any slicing modifications need to be communicated to us in the “Special Requests” section of the 3D printing form, keeping in mind that we cannot guarantee the outcome of your request. Certain settings may lead to stronger prints but may also affect the print’s likelihood of success.
It’s also important to keep in mind that 3D prints can be fragile and must be handled with care.
Solutions:
- Increase the infill
- Choose a stronger printing method: FDM < SLA < SLS
If a small piece broke off:
- Increase the thickness/size of the fragile piece
- Consider removing it or fabricating it through other methods
- Print it separately and then reattach it to the main model
If the model broke in half:
- Choose a more geometrically strong infill pattern (Gyroid and Triangles tend to result in stronger FDM prints)
- Increase the amount of walls/wall loops
- Consider the orientation of the print
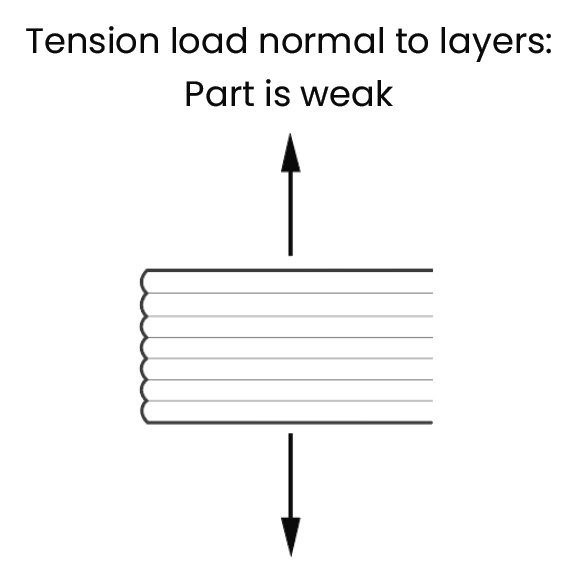
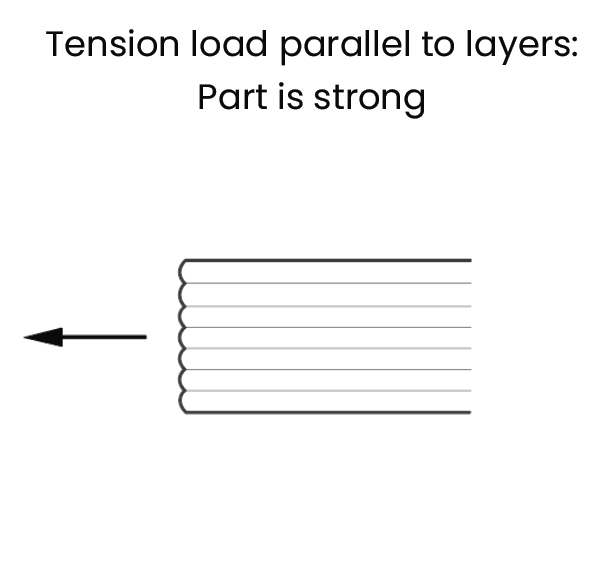
You can request a certain orientation in the “Special Requests” keeping in mind that orientation also has an impact on the print’s likelihood of success as well as level of detail (see: (google doc) Missing Details (external link) ).
- Examine the use case of the part and determine whether a 3D print is the best method for producing your piece.
- When a 3D print is put under stress, without certain factors taken into account, it can lead to breakage


