Create and Share a Class Folder in Google Drive

Google Drive allows you to create and upload files while offering real-time collaboration features such as the ability to share files with your entire class and simultaneously edit a Google Document. You can access your Google Drive files whenever you have Internet access. The use of Google Drive is available to everyone at TMU.
Instructors can use Google Drive to set up a shared class folder, upload course content files, and grant their students permission to access it. Reminder: While Google Drive is not meant to replace the use of TMU’s Learning Management System, Brightspace by D2L, which also has a content area to share files with your class, Google Drive has some useful features for storage, sharing and collaboration.
Here’s how to create a shared folder, upload files and share the folder with your class in Google Drive:
- Create a folder
- Upload Files to your class folder
- Share the folder with your students
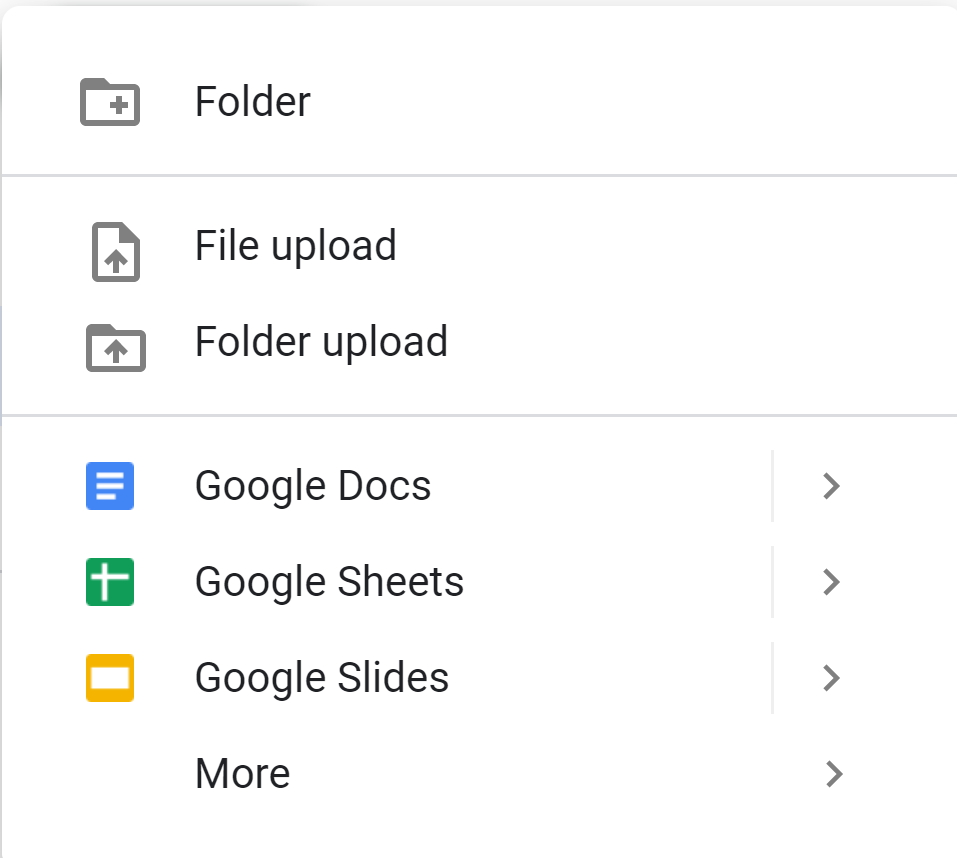
1. From within your TMU Google Drive, on the left, select New > Folder.

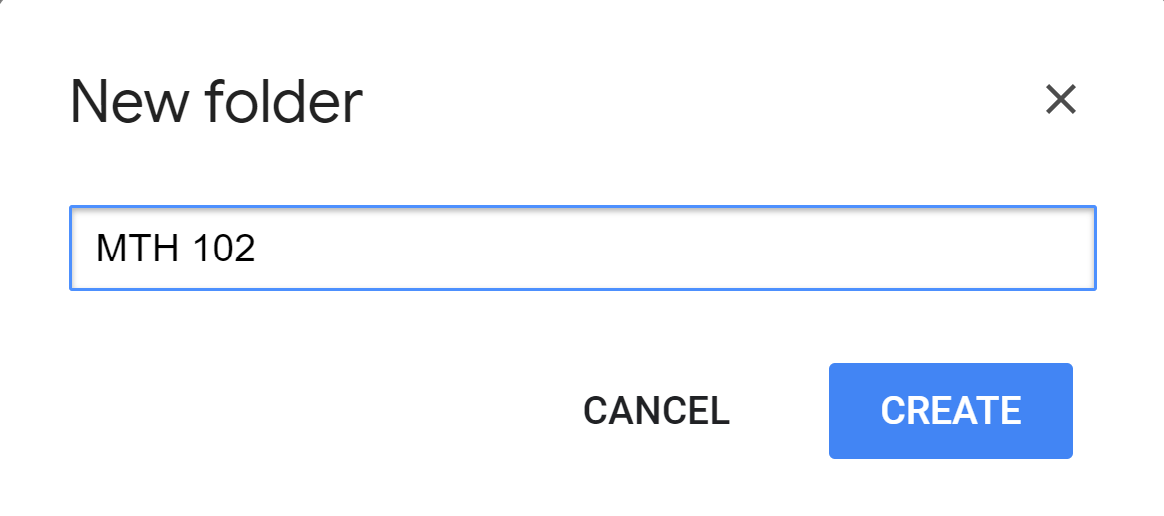
2. Enter a name for the folder. In the below example, we are creating a folder for our course “MATH 102”.
3. Click Create. You will now see this folder in your My Drive. It is private, only to you until you choose to share it.

You can upload almost any file type (external link) to be stored on your Google Drive.
Click on your newly created class folder.
Click New > File Upload.
Browse your computer to find the file(s) or folders you’d like to upload to this folder
- Click Open to begin uploading.
Alternatively, you can drag and drop files from your libraries on your computer into your Google Drive.
Note that within your class folder, you can also create new subfolders to further organize your content, similar to folders you would create on your own computer. The advantage of Google Drive is that you can access these files on any device you have the Internet connection.
Privacy and Security Tips
1. When you share a folder with your students, and give them “Can Edit” permissions, they are considered collaborators or “editors” of this folder. By default, editors of a folder are also allowed to add new people to the folder and to change the permissions on the folder. If you do not want your students to have these rights, then you will need to do the following (as the owner):
- Click the Settings icon in the top right of the Share with People and Groups window.
- In the Share with people settings window, uncheck the box beside “Editors can change permissions and share”.

2. Anyone with collaborator access to a shared Google Drive folder will allow them to download files from the folder, as well as remove the instructor’s or their peer’s files from the folder. While the activity in the shared folder is trackable, some instructors may find this problematic.
3. Any files added to a shared Google Drive folder will list the “owner” (individual who uploaded the file). All members who have access to that shared folder will see who is the “owner” of each file.
4. For complete instructions on sharing folders or files on different devices, visit Google’s support site (external link) .


