Notifications and user settings

Would you like to be notified by email when there are changes to your courses?
Notifications is a tool that allows you to enable an email alert when there are new items in your course. You can set up a notification to alert you about new content items, news/announcements, and even posted grades.
Each user is responsible for setting up notifications for their courses - it is not something Instructors will be able to do for them.
In addition to using notifications to remind you of any changes in your courses, it's a great idea to make a habit of regularly visiting the course shell for each course you are taking, to ensure that you are aware of course expectations, upcoming deadlines, etc.
Note: You will still be able to receive emails sent from instructors despite any changes made to your notification settings.
Warning: As of May 1, 2024, SMS (text message) notifications are no longer available. Read more about this change.
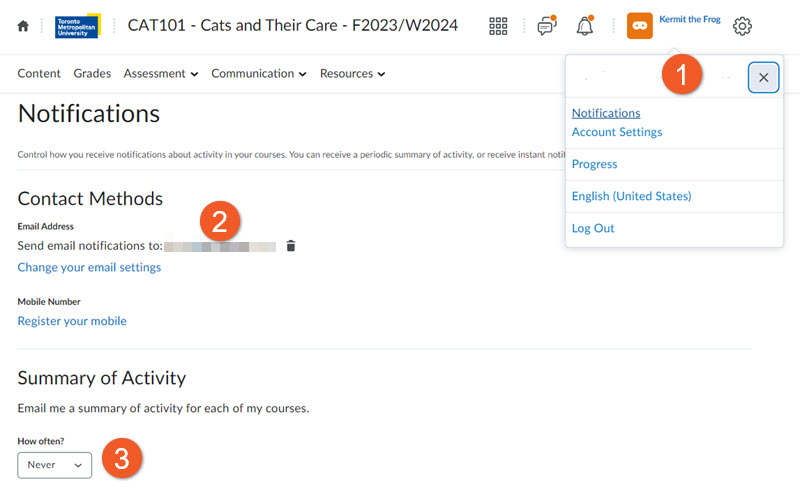
1. In the top right corner of the minibar, under your name, click Notifications.
2. Notifications will always go to the email address associated with your account in Brightspace. For TMU students, faculty and staff, this will be your @torontomu.ca email address.
3. Summary of Activity
- This option will email you a summary of all activity for each course, as opposed to an instant email for each notification item.
- Select how often you receive an email notification: Never (turns this option off), Daily (set an appropriate time), or Weekly (set an appropriate day and time).
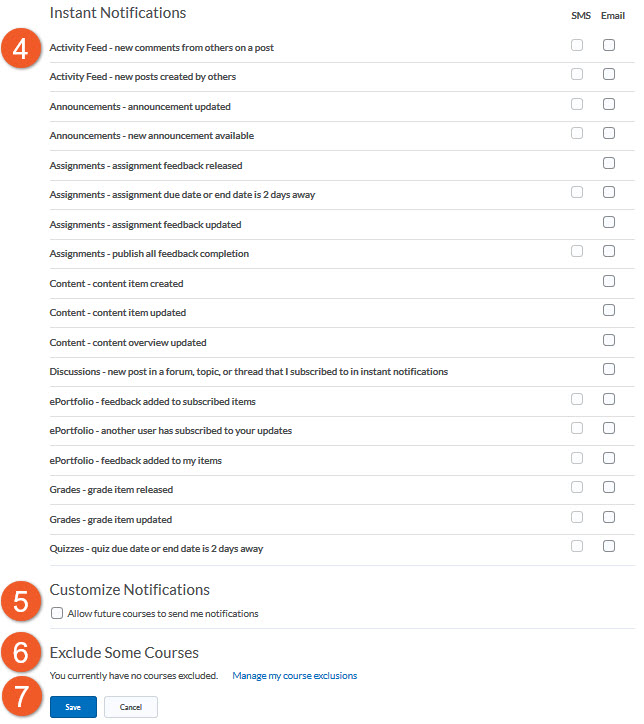
4. Instant Notifications
- Review and select any area you would like to receive Email notifications
5. Customize Notifications
- Review the options and select any that you would like.
6. Exclude some courses
- You may choose the courses for which you don’t want to receive notifications.
7. Click Save to save your changes.
D2L Brightspace: SMS Notifications ended May 1, 2024
If you previously enabled SMS notifications (text messaging) to keep informed of activity in your courses in D2L Brightspace., please note that as of May 1, 2024, D2L Brightspace has ended its SMS notification service and will no longer share course updates via text messaging.
Additional information regarding these changes can be found on the What’s New page on the TMU Brightspace website.
Why will SMS notifications no longer be available?
Many wireless providers are deprecating the service that D2L has been using for SMS notifications. There have been frequent service disruptions, rendering these notifications unreliable.
Do I need to do anything?
If you wish to receive notifications from your Brightspace courses via email, you will need to enable them in your Brightspace account. Please find instructions above, in the section called "Email notifications".
You do not need to make any changes to your SMS settings - they have ceased automatically on May 1.
What will happen to stored phone numbers after this?
When D2L disabled this service, your phone number was permanently deleted from the Brightspace system.
Questions?
If you have any questions about these changes, please contact the Computing and Communications Services (CCS) Help Desk via the IT Help portal, or help@torontomu.ca
What is a "summary of activity"?
This is a scheduled email (either daily or weekly) that contains a list of updates from a specific Brightspace shell. If enabled, you will receive an email for *each* shell that you currently have access to, except for those you have added to the exclusion list.
Please note that users cannot control which areas of the course are included in the email summaries. The list of items with checkboxes are only related to Instant Notifications, and not summaries.
To enable a scheduled email summary, simply select "Daily" or "Weekly" from the menu and follow the on-screen prompts.

What is included?
The following are among the items included in an email summary:
- Unread discussion posts
- Content updates
- Quizzes not attempted
- New assignment submission files
There are times when you are receiving too many notifications from a Brightspace shell that you aren't actively engaged in. You may choose to exclude these shells from your Notifications.
-

Scroll to the bottom of the Notifications tool, to the "Exclude some courses" section.
Click the link "Manage my course exclusions".
-
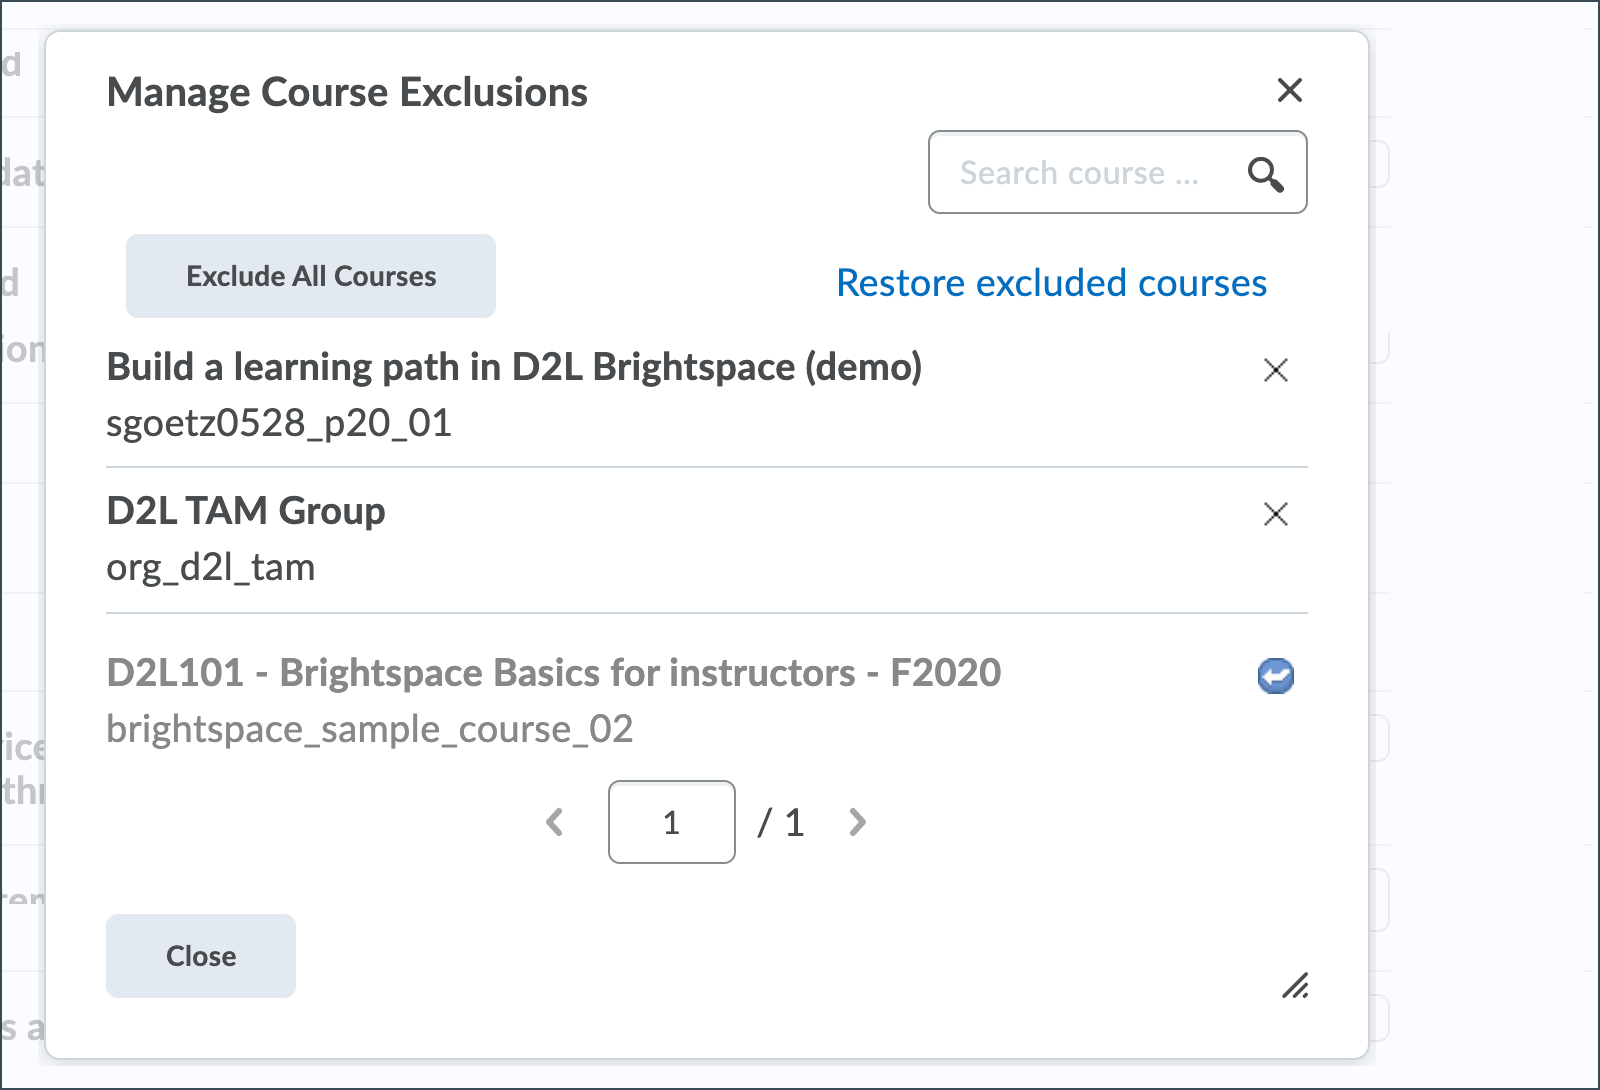
Click the "X" to the right of any course you wish to exclude from the notifications. This will change the "X" to an arrow. Click "Close" to complete the change.
If you have many Brightspace shells, you can use the search box at the top to locate a specific shell.
To restore notifications for an excluded shell:
- Locate the shell in the list, and click the arrow icon to the right of the shell name. This will change the arrow back to an "X".
- Click "Close" to complete the change.
Alternatively, you can click "Restore excluded courses" to restore notifications for ALL shells that were excluded.
There are a number of user-specific settings that can be used to optimize your experience with Brightspace. This is often most useful when using assistive technologies.
Here are a few highlighted settings that you may find useful.
Locate these settings by clicking on your name in the upper-right corner, then "Account Settings".
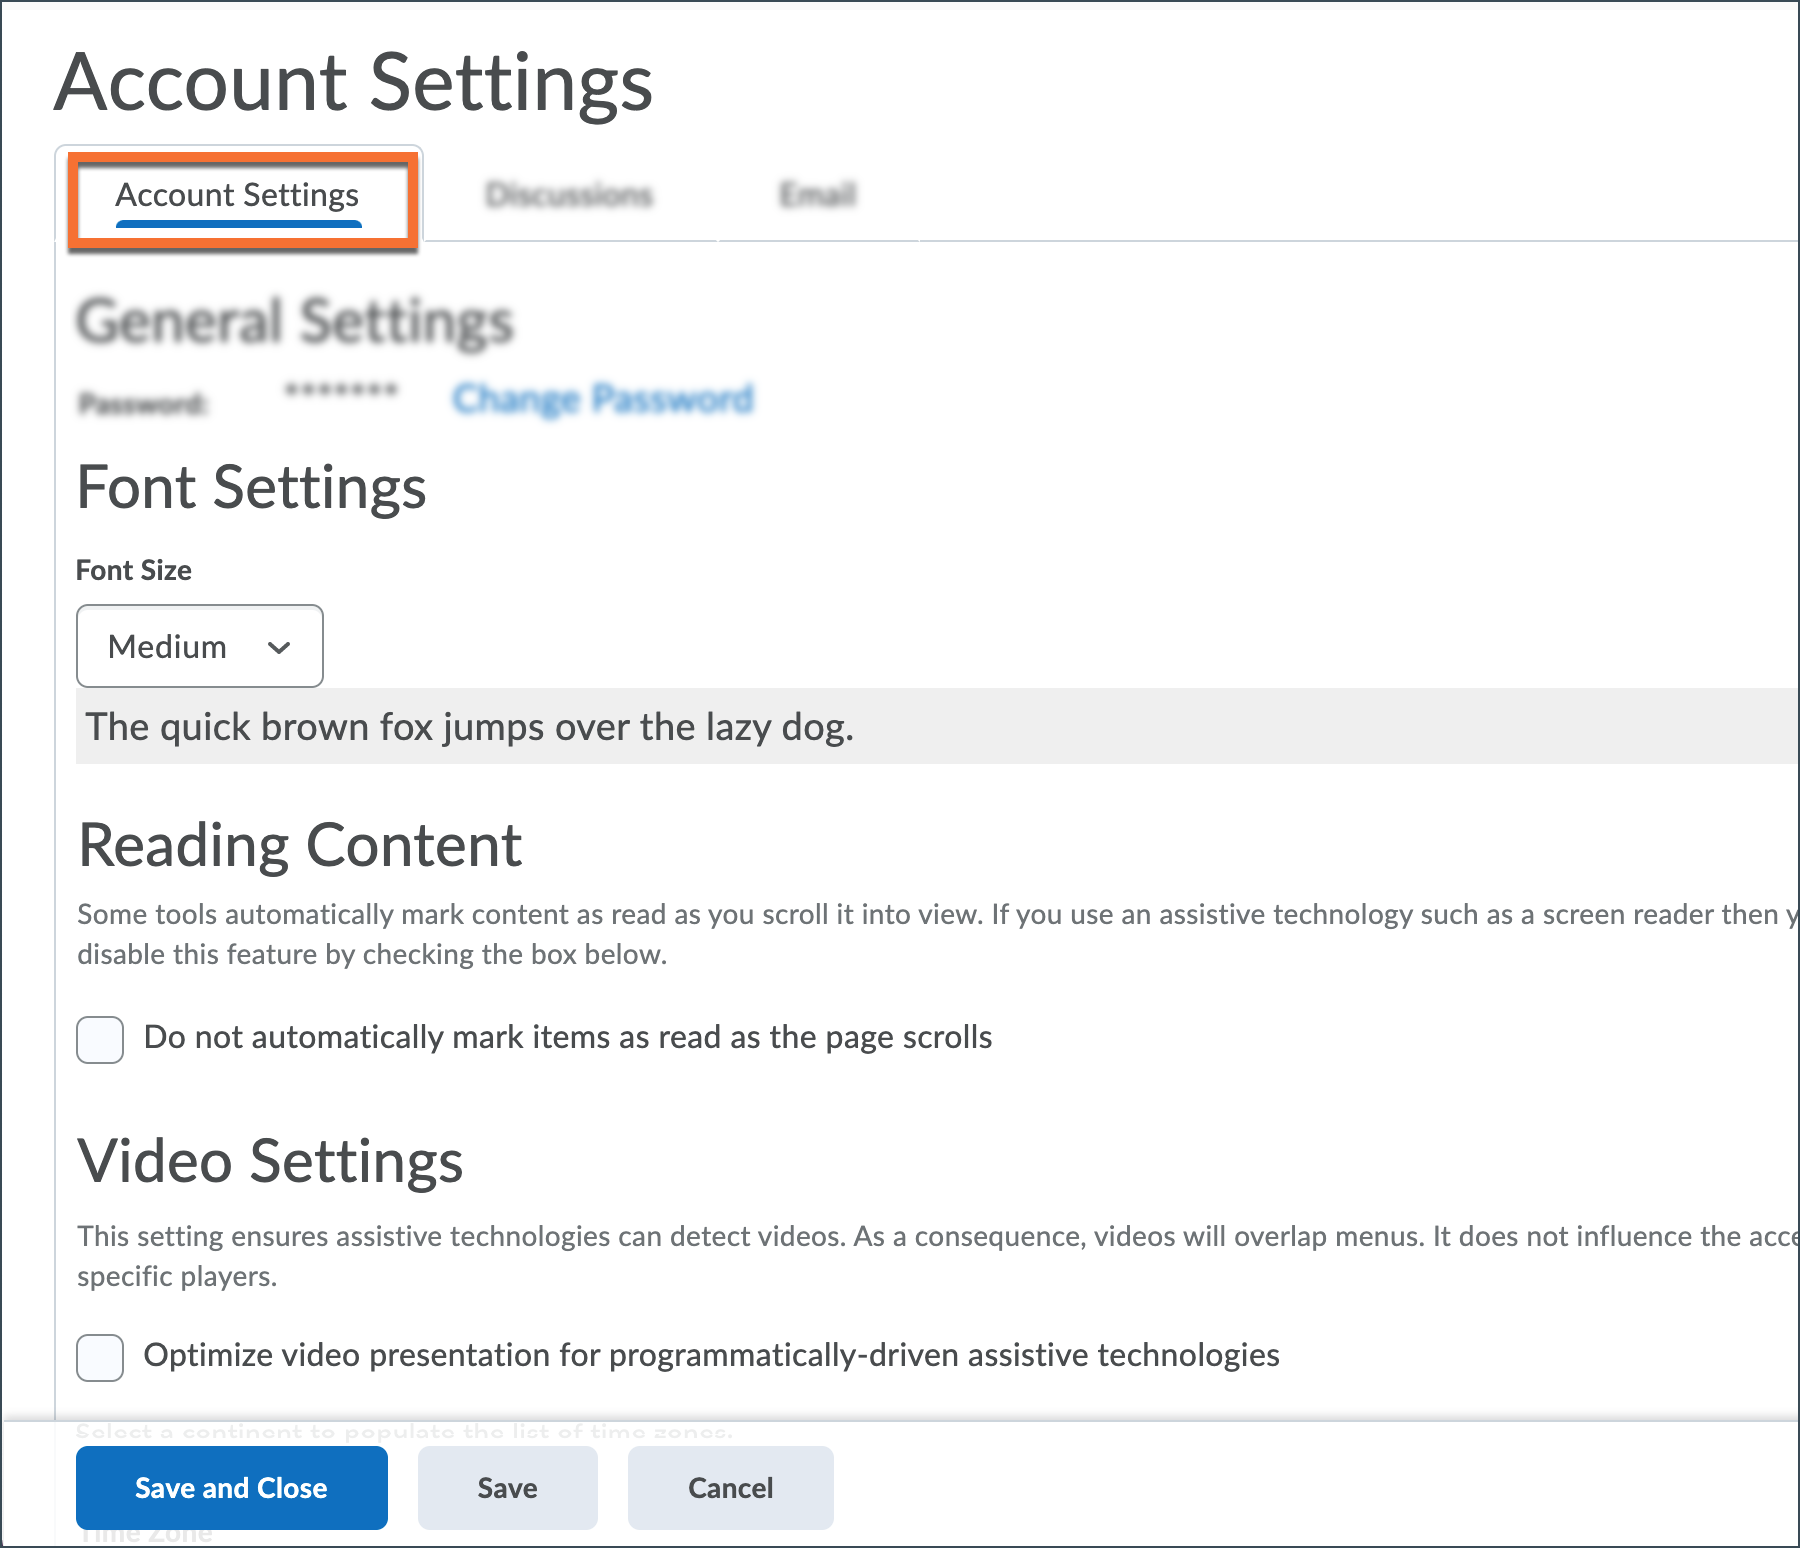
Font Settings
Control the readability of the text in Brightspace by selecting an appropriate size.
Reading Content
Some tools automatically mark content as read as you scroll it into view. If you use an assistive technology such as a screen reader then you may wish to disable this feature by checking the box "Do not automatically mark items as read as the page scrolls".
Video Settings
This setting ensures assistive technologies can detect videos. As a consequence, videos will overlap menus. It does not influence the accessibility of specific players.
To enable, simply check the box "Optimize video presentation for programmatically-driven assistive technologies".
Be sure to click the "Save" or "Save and Close" button, found at the bottom of the page, to save any changes you make.
The "Email" settings allow you to customize your email experience in Brightspace.
Please note that this only impacts the emails you send from inside D2L Brightspace. The emails you send from another email application, including GMail, may have different settings enabled.
Locate these settings by clicking on your name in the upper-right corner, then "Account Settings".
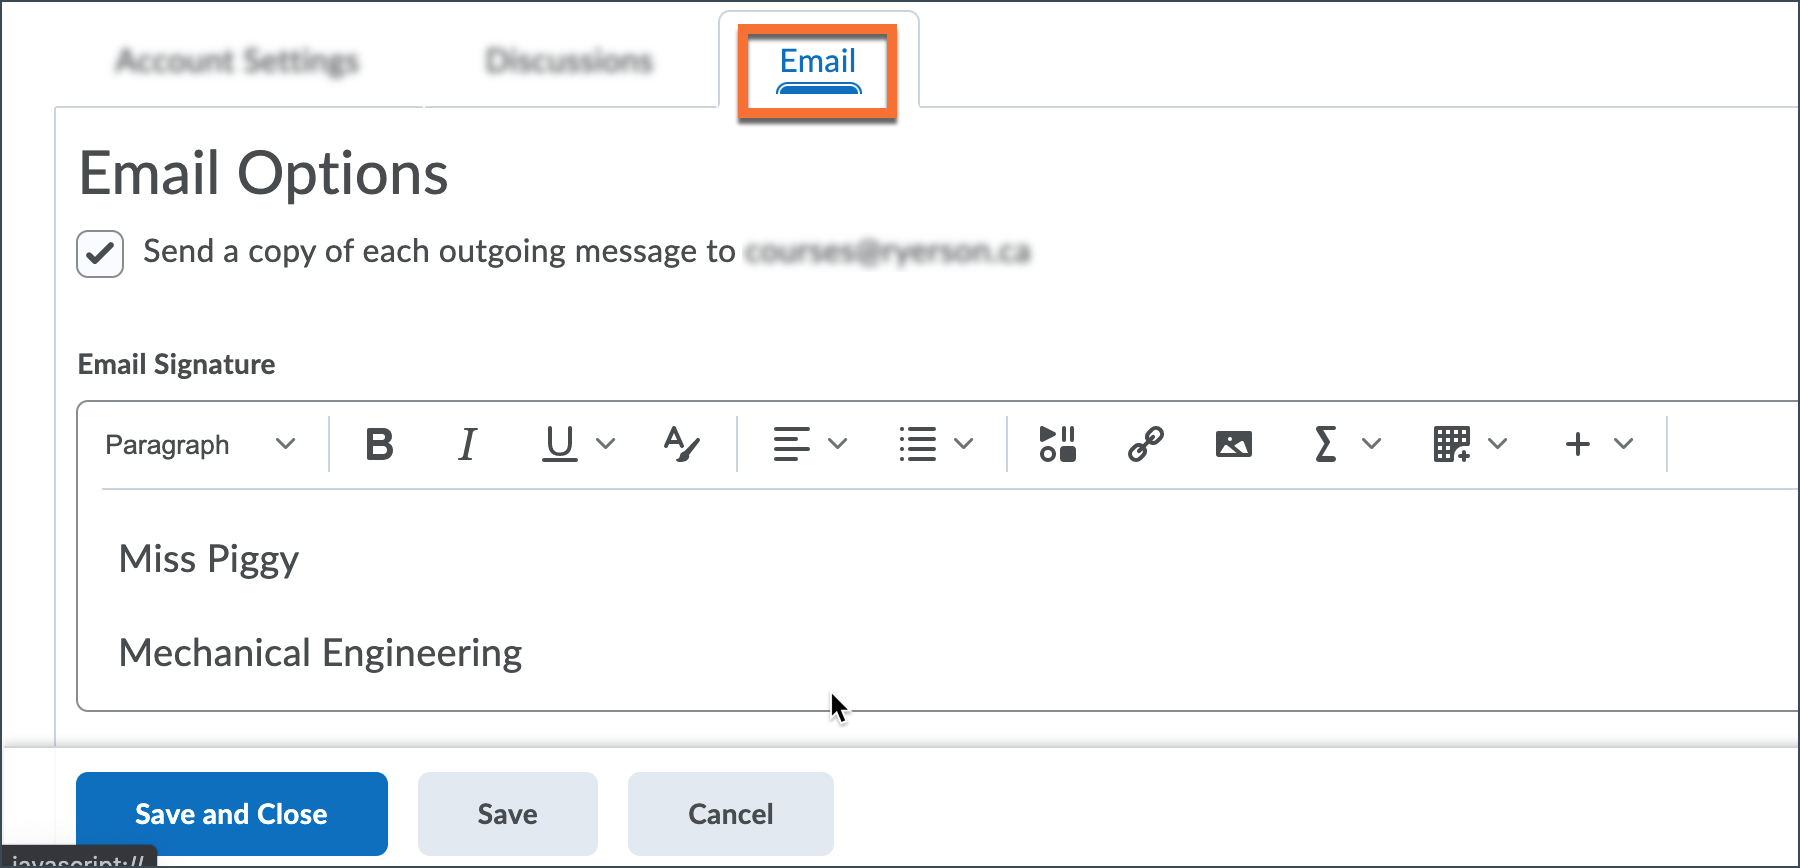
Click the "Email" tab in your account settings page. Here, you can:
- check to "Send a copy of each outgoing message to ..." your email address
- set your email signature
Did you know that you can generate a web address for your Brightspace calendar, so you can view the entries from another calendar application (like Google Calendar)?
The following steps outline how to generate that address. Please follow the instructions in your calendar application for displaying an external calendar.
Locate these settings by clicking on the name "Calendar" for the calendar module on your Brightspace homepage.
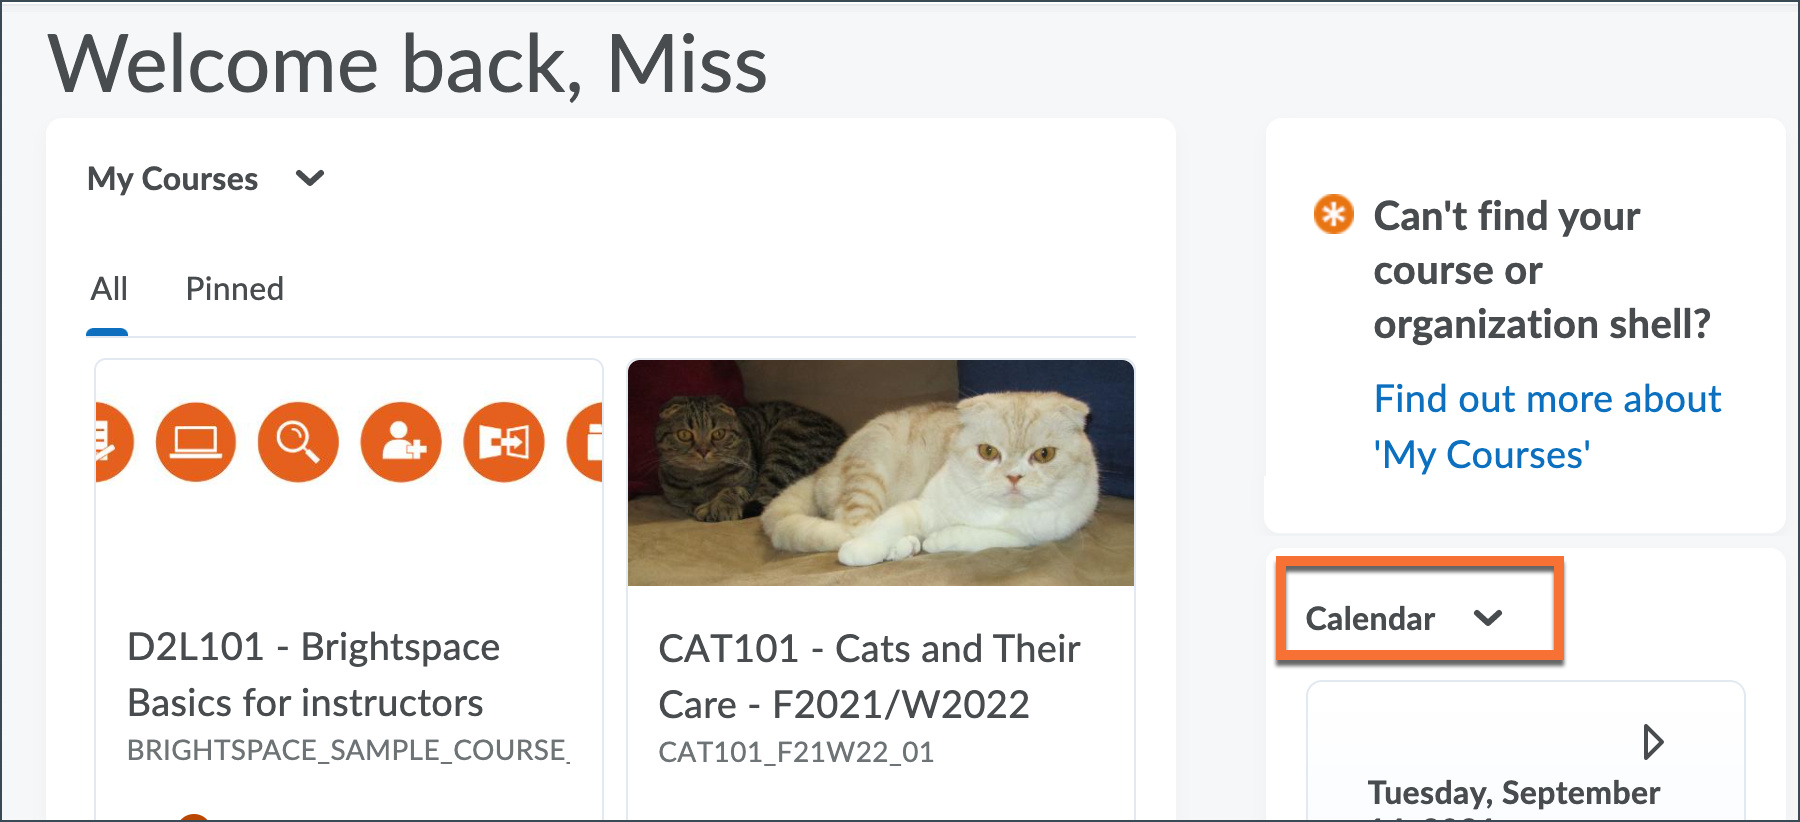
On your D2L Brightspace homepage, locate the "Calendar" module and click the name "Calendar", displayed at the top of the module.
This will open your D2L Brightspace Calendar tool, which aggregates all of the calendar items from your various Brightspace shells, as well as any personal calendar entries you may make.

In your Brightspace Calendar, click the "Subscribe" button in the top-right corner.
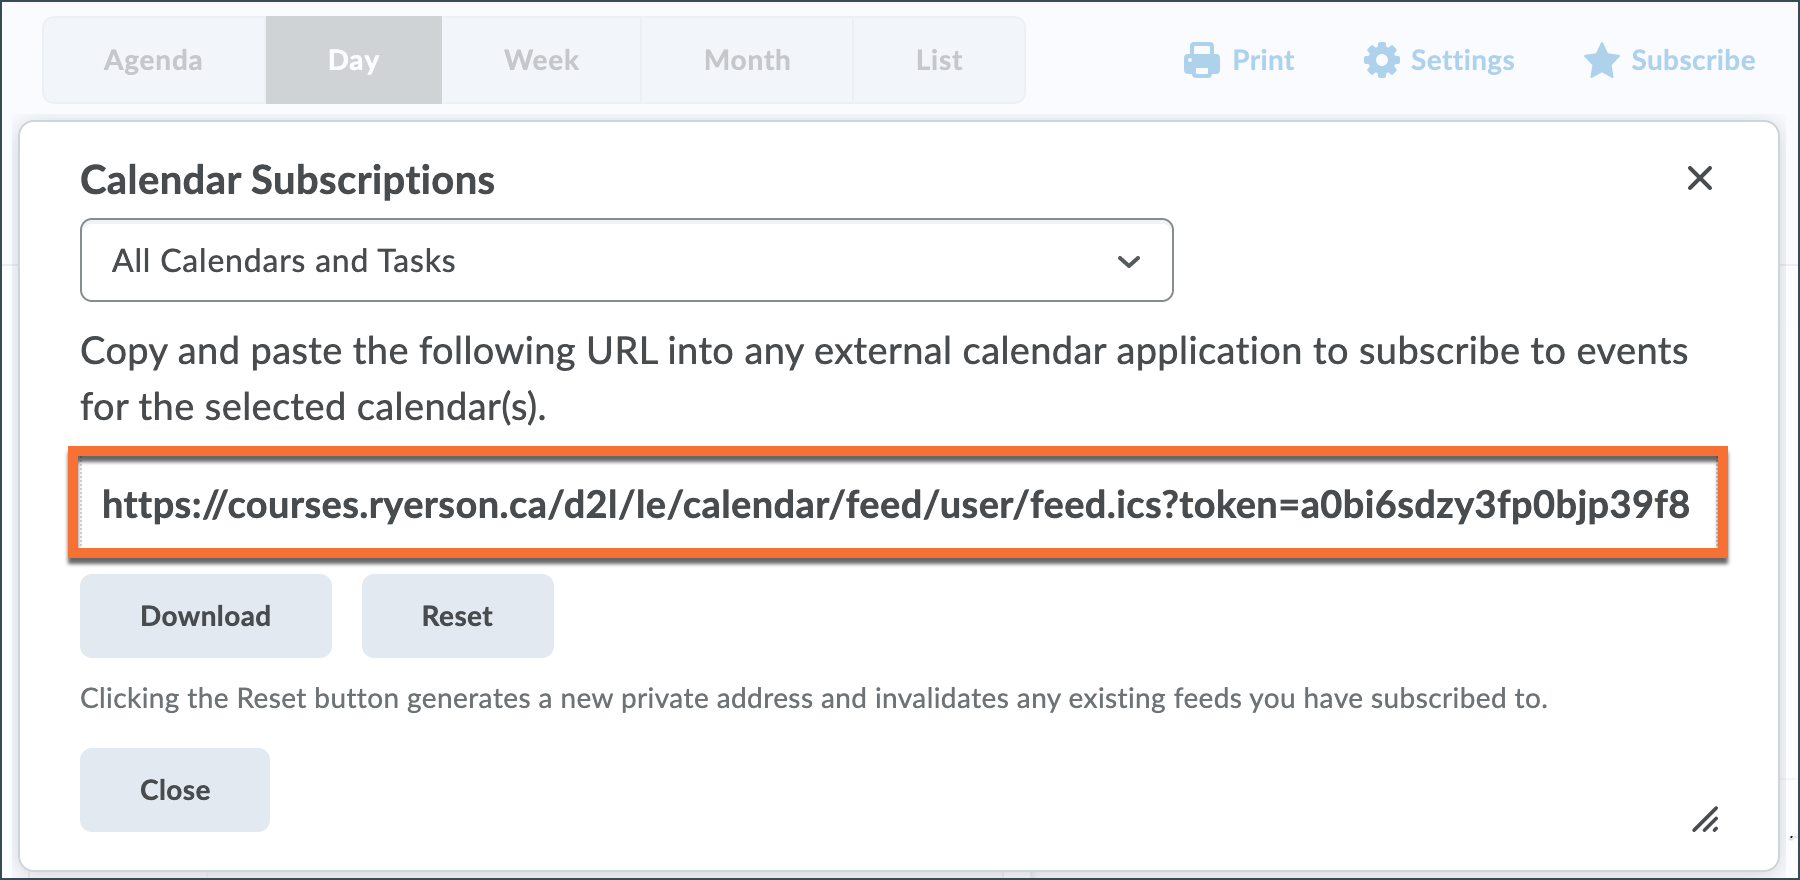
On the resulting pop-up, you will see the URL for your calendar feed displayed.
- Copy the URL for your Brightspace calendar feed
How do I add this calendar feed to my calendar application?
Each calendar application is different, so we can't provide instructions for how to do this. Start by searching your application's help section for more information. Since we support Google Workspace for Education at Toronto Metropolitan University, we have linked to those instructions below.
How do I create a feed for just one course's calendar?
By default, this is set to include "All Calendars and Tasks". To change this, simply click where it says "All Calendars and Tasks", and select a different calendar from the drop-down menu.
* Please note that you can only have one calendar feed at a time, so if you generate a feed for the calendar in a specific course shell, you cannot have a second one for a different course shell.
At this time, we do not have the Brightspace User Profile enabled, as it does not meet the university's user information privacy standards.
We will continue to re-assess this feature as changes are made.