Use the D2L ePortfolio
ePortfolio End of Life Announcement
All access to the ePortfolio tool at TMU will end on August 5, 2025. This comes after years of declining use at TMU and an end to updates by the vendor, D2L.
You can no longer post new content in the ePortfolio tool.
If you have previously posted content, please see below for instructions to review and download anything that you wish to keep.
Overview

The ePortfolio is a tool that allows you to collect samples of your work ("artifacts"), write about experiences you have ("reflections") and then choose whether to share them with others (like Instructors, or even potential employers).
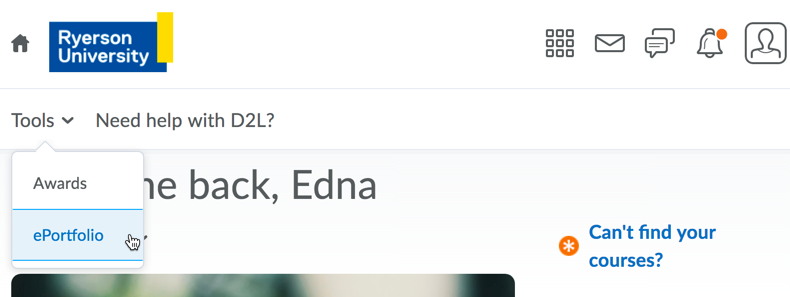
Until August 5, 2025, users can access their ePortfolio from the D2L Homepage, by going to the Tools menu and clicking 'ePortfolio'.
When ePortfolio is removed, you will no longer be able to access your posted content. Please review your posts, and download anything that you wish to keep, before August 5, 2025.
We have created some instructions, so you can save your work from the ePortfolio tool:
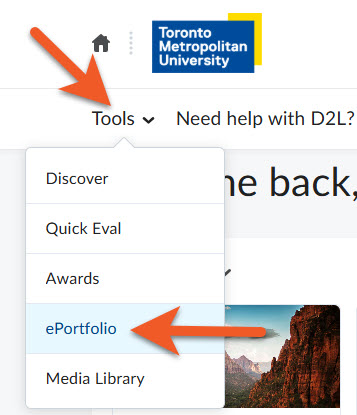
On your MyCourses page, click on Tools > ePortfolio.
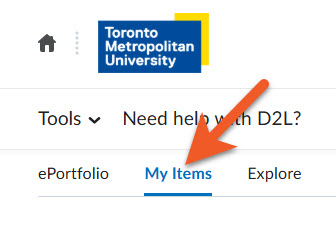
At the top of the page, click on My Items.
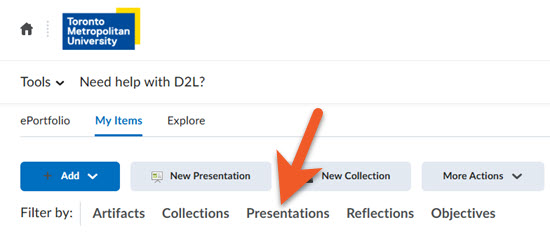
Click on Presentations.
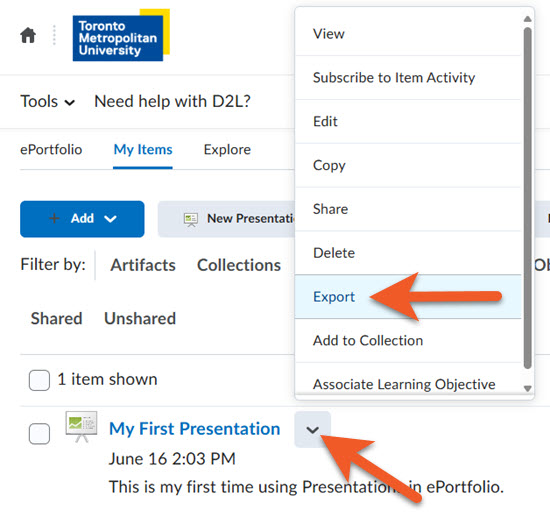
Click on the contextual menu for the presentation you wish to download, then click on Export.
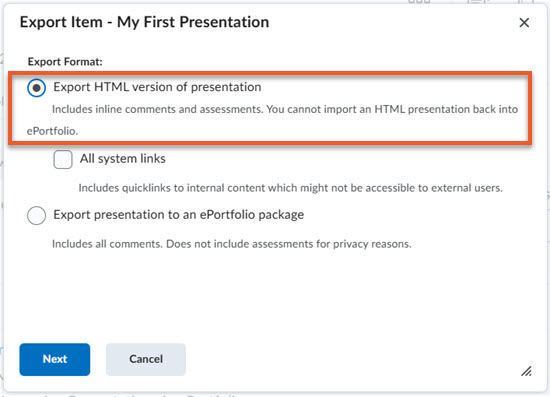
Make sure you select the first option, “Export HTML version of presentation”. This will ensure you can view the presentation on your computer.
Click on Next.
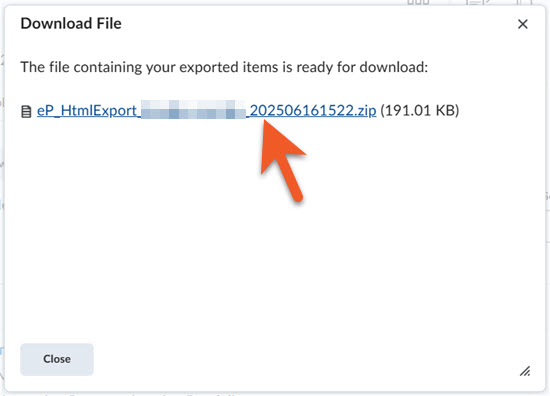
When you see the message that your file is ready to download, click on the file name, to save it to your computer.
The file will be in the default folder on your computer where all downloads are saved.
To view your presentation, navigate to the .zip file, and extract the files. Navigate to the file named “index” and double-click on it, to open in a web browser.
Please note that downloaded presentations retain all of their content, but if you applied a “theme”, you will not see it, because themes are only viewable within D2L Brightspace.
Repeat the process for any other presentations you wish to download.
Please note that while each item in ePortfolio does have an “export” option in the contextual menu, you cannot export Artifacts, Collections or Reflections, as is, to view or use in any other system or software. This file will only work in ePortfolio. It is not viewable on its own.

If you uploaded a file, such as a Word document, for an Artifact, click on the Artifact name to preview it. Then, you should see a “Download” or “Open file” link that allows you to download that file.
However, if you want to copy any description that you added to the artifact, you’ll need to copy and paste that from the page in D2L Brightspace.
If you wish to save any other content from ePortfolio, we recommend copy-pasting the content from D2LBrightspace into a document, such as a Google Doc or Google Slides. You will probably want to reformat the content, to suit your personal preferences.
